• Lost Soul Aside launches today with free playable demo

    I’m thrilled to share that Lost Soul Aside is officially out today on PlayStation 5 console and PC via Steam and the Epic Game Store, and you can also jump in with a free playable demo starting today!

    Play Video

    From the very beginning, this project was born out of a dream to create fast, fluid, and visually striking action gameplay, and I’m incredibly excited that you can now experience the full adventure – or get a taste of it with the demo.

    Blades flash like lightning. Movements blur like wind. This is the heart of Lost Soul Aside and today marks just the start of your journey.

    Play Video

    Demo beginner’s guide: The art of high-speed combat

    In this demo trailer, Kaser and Arena join forces to overwhelm enemies with their lightning-fast, high-octane combat style. The trailer showcases radically distinct weapon techniques, split-second combat performances, and a breathtaking dance of clashing blades, embodying the game’s combat philosophy – “Strikes roar like thunder, evade fade as phantoms.”This playable demo features an early-game boss challenge and a mid-game adventure stage, allowing players to experience Lost Soul Aside’s signature combat system: 

    Core combat: fast-paced, seamlessly smooth, and endless-combos.

    Seamless weapon switching: Swordand Greatswordenable endless combo variations, making battles flow like poetry in motion.

    Aerial combat: Launch enemies mid-air and strike with unstoppable combo storm.

    Boss encounters: Face off against enemies like Rose Queen, Holy Knight Commander Victor, and the titanic Ancient Mecha. Master movement, timing, and counterattacks to survive.

    View and download image

    Download the image

    close
    Close

    Download this image

    View and download image

    Download the image

    close
    Close

    Download this image

    View and download image

    Download the image

    close
    Close

    Download this image

    Combat tips: Precise Dodges, Precise Blocks, Energy Burst Pursuits

    Perfect Dodge: Evade at the last moment to trigger a special counterattack.

    Precise Block: When blocking an enemy’s powerful attack right as the blue circle warning appears, you’ll stagger them and create an opening.

    Burst Pursuit: When a blue glow appears on Kaser, press the Burst Pursuit button to unleash a spectacular strike.

    View and download image

    Download the image

    close
    Close

    Download this image

    View and download image

    Download the image

    close
    Close

    Download this image

    The journey starts now

    Whether you’re a hardcore action gamer or someone who loves exploring breathtaking fantasy worlds, now’s your chance to dive in. The full game is available now, and you can also try it free with the playable demo on both PlayStation 5 console and PC via Steam.

    If you haven’t already, check out our behind-the-scenes video in our previous article to see how the world, combat, and characters came to life.

    Thank you for all your support over the years. Now go push your limits, master every combo, and show us what you’ve got.
    #lost #soul #aside #launches #today
    Lost Soul Aside launches today with free playable demo
    I’m thrilled to share that Lost Soul Aside is officially out today on PlayStation 5 console and PC via Steam and the Epic Game Store, and you can also jump in with a free playable demo starting today! Play Video From the very beginning, this project was born out of a dream to create fast, fluid, and visually striking action gameplay, and I’m incredibly excited that you can now experience the full adventure – or get a taste of it with the demo. Blades flash like lightning. Movements blur like wind. This is the heart of Lost Soul Aside and today marks just the start of your journey. Play Video Demo beginner’s guide: The art of high-speed combat In this demo trailer, Kaser and Arena join forces to overwhelm enemies with their lightning-fast, high-octane combat style. The trailer showcases radically distinct weapon techniques, split-second combat performances, and a breathtaking dance of clashing blades, embodying the game’s combat philosophy – “Strikes roar like thunder, evade fade as phantoms.”This playable demo features an early-game boss challenge and a mid-game adventure stage, allowing players to experience Lost Soul Aside’s signature combat system:  Core combat: fast-paced, seamlessly smooth, and endless-combos. Seamless weapon switching: Swordand Greatswordenable endless combo variations, making battles flow like poetry in motion. Aerial combat: Launch enemies mid-air and strike with unstoppable combo storm. Boss encounters: Face off against enemies like Rose Queen, Holy Knight Commander Victor, and the titanic Ancient Mecha. Master movement, timing, and counterattacks to survive. View and download image Download the image close Close Download this image View and download image Download the image close Close Download this image View and download image Download the image close Close Download this image Combat tips: Precise Dodges, Precise Blocks, Energy Burst Pursuits Perfect Dodge: Evade at the last moment to trigger a special counterattack. Precise Block: When blocking an enemy’s powerful attack right as the blue circle warning appears, you’ll stagger them and create an opening. Burst Pursuit: When a blue glow appears on Kaser, press the Burst Pursuit button to unleash a spectacular strike. View and download image Download the image close Close Download this image View and download image Download the image close Close Download this image The journey starts now Whether you’re a hardcore action gamer or someone who loves exploring breathtaking fantasy worlds, now’s your chance to dive in. The full game is available now, and you can also try it free with the playable demo on both PlayStation 5 console and PC via Steam. If you haven’t already, check out our behind-the-scenes video in our previous article to see how the world, combat, and characters came to life. Thank you for all your support over the years. Now go push your limits, master every combo, and show us what you’ve got. #lost #soul #aside #launches #today
    Lost Soul Aside launches today with free playable demo
    blog.playstation.com
    I’m thrilled to share that Lost Soul Aside is officially out today on PlayStation 5 console and PC via Steam and the Epic Game Store, and you can also jump in with a free playable demo starting today! Play Video From the very beginning, this project was born out of a dream to create fast, fluid, and visually striking action gameplay, and I’m incredibly excited that you can now experience the full adventure – or get a taste of it with the demo. Blades flash like lightning. Movements blur like wind. This is the heart of Lost Soul Aside and today marks just the start of your journey. Play Video Demo beginner’s guide: The art of high-speed combat In this demo trailer, Kaser and Arena join forces to overwhelm enemies with their lightning-fast, high-octane combat style. The trailer showcases radically distinct weapon techniques, split-second combat performances, and a breathtaking dance of clashing blades, embodying the game’s combat philosophy – “Strikes roar like thunder, evade fade as phantoms.”This playable demo features an early-game boss challenge and a mid-game adventure stage, allowing players to experience Lost Soul Aside’s signature combat system:  Core combat: fast-paced, seamlessly smooth, and endless-combos. Seamless weapon switching: Sword (split-second strikes) and Greatsword (earth-shattering power) enable endless combo variations, making battles flow like poetry in motion. Aerial combat: Launch enemies mid-air and strike with unstoppable combo storm. Boss encounters: Face off against enemies like Rose Queen, Holy Knight Commander Victor, and the titanic Ancient Mecha. Master movement, timing, and counterattacks to survive. View and download image Download the image close Close Download this image View and download image Download the image close Close Download this image View and download image Download the image close Close Download this image Combat tips: Precise Dodges, Precise Blocks, Energy Burst Pursuits Perfect Dodge: Evade at the last moment to trigger a special counterattack. Precise Block: When blocking an enemy’s powerful attack right as the blue circle warning appears, you’ll stagger them and create an opening. Burst Pursuit: When a blue glow appears on Kaser, press the Burst Pursuit button to unleash a spectacular strike. View and download image Download the image close Close Download this image View and download image Download the image close Close Download this image The journey starts now Whether you’re a hardcore action gamer or someone who loves exploring breathtaking fantasy worlds, now’s your chance to dive in. The full game is available now, and you can also try it free with the playable demo on both PlayStation 5 console and PC via Steam. If you haven’t already, check out our behind-the-scenes video in our previous article to see how the world, combat, and characters came to life. Thank you for all your support over the years. Now go push your limits, master every combo, and show us what you’ve got.
    Like
    Love
    Wow
    Sad
    Angry
    152
    · 2 Comments ·0 Shares
  • Official PlayStation Podcast Episode 522: Silence, Snakes, and Swords

    Email us at PSPodcast@sony.com!

    Subscribe via Apple Podcasts, Spotify, or download here

    Hey, everybody! Kristen, Tim, and I are back this week to discuss taking up the mantle of Big Boss in Metal Gear Solid Delta: Snake Eater, soul surfing in Sword of the Sea, the biggest news stories of the week, and more.

    Stuff We Talked About

    Next week’s release highlights:

    Metal Eden | PS5

    Hirogami | PS5

    Hell Is Us | PS5

    Hollow Knight: Silksong | PS5, PS4

    Cronos: The New Dawn | PS5

    Everybody’s Golf: Hot Shots | PS5

    NBA 2K26 | PS5, PS4

    Romeo is a Dead Man sneak peek — New info on combat and puzzles, along with the major story beats of its ludicrous narrative.

    Helldivers 2 update — Enter the Terminid Hive Worlds and battle underground monsters when the Dust Devils Premium Warbond lands September 4.

    Lumines Live release date  — Try out the limited-time demo for PS5 to experience the new multiplayer mode and more before the game launches on November 11.

    GT7 1.62 update  — Add the sleek Chevrolet Corvette CX to your collection and other eye candy with the latest batch of new vehicles.

    No Man’s Sky Voyagers update  — Customizable multi-crew starships are now available. Cruise the galaxy as a unit and face new challenges..

    New Judas details  — See how your decisions impact gameplay and other insights from Creative Director Ken Levine.

    Skate hands-on  — Play Early Access starting September 16 for free and explore San Vansterdam and its many choice spots.

    Shinobi: Art of Vengeance dev interview  — Learn what steps were taken to create a modern take on the classic action platformer

    The Cast

    View and download image

    Download the image

    close
    Close

    Download this image

    Kristen Zitani –  Senior Content Communications Specialist, SIE

    View and download image

    Download the image

    close
    Close

    Download this image

    Tim Turi – Content Communications Manager, SIE

    View and download image

    Download the image

    close
    Close

    Download this image

    O’Dell Harmon Jr. – Content Communications Specialist, SIE

    Thanks to Dormilón for our rad theme song and show music.
    #official #playstation #podcast #episode #silence
    Official PlayStation Podcast Episode 522: Silence, Snakes, and Swords
    Email us at PSPodcast@sony.com! Subscribe via Apple Podcasts, Spotify, or download here Hey, everybody! Kristen, Tim, and I are back this week to discuss taking up the mantle of Big Boss in Metal Gear Solid Delta: Snake Eater, soul surfing in Sword of the Sea, the biggest news stories of the week, and more. Stuff We Talked About Next week’s release highlights: Metal Eden | PS5 Hirogami | PS5 Hell Is Us | PS5 Hollow Knight: Silksong | PS5, PS4 Cronos: The New Dawn | PS5 Everybody’s Golf: Hot Shots | PS5 NBA 2K26 | PS5, PS4 Romeo is a Dead Man sneak peek — New info on combat and puzzles, along with the major story beats of its ludicrous narrative. Helldivers 2 update — Enter the Terminid Hive Worlds and battle underground monsters when the Dust Devils Premium Warbond lands September 4. Lumines Live release date  — Try out the limited-time demo for PS5 to experience the new multiplayer mode and more before the game launches on November 11. GT7 1.62 update  — Add the sleek Chevrolet Corvette CX to your collection and other eye candy with the latest batch of new vehicles. No Man’s Sky Voyagers update  — Customizable multi-crew starships are now available. Cruise the galaxy as a unit and face new challenges.. New Judas details  — See how your decisions impact gameplay and other insights from Creative Director Ken Levine. Skate hands-on  — Play Early Access starting September 16 for free and explore San Vansterdam and its many choice spots. Shinobi: Art of Vengeance dev interview  — Learn what steps were taken to create a modern take on the classic action platformer The Cast View and download image Download the image close Close Download this image Kristen Zitani –  Senior Content Communications Specialist, SIE View and download image Download the image close Close Download this image Tim Turi – Content Communications Manager, SIE View and download image Download the image close Close Download this image O’Dell Harmon Jr. – Content Communications Specialist, SIE Thanks to Dormilón for our rad theme song and show music. #official #playstation #podcast #episode #silence
    Official PlayStation Podcast Episode 522: Silence, Snakes, and Swords
    blog.playstation.com
    Email us at PSPodcast@sony.com! Subscribe via Apple Podcasts, Spotify, or download here Hey, everybody! Kristen, Tim, and I are back this week to discuss taking up the mantle of Big Boss in Metal Gear Solid Delta: Snake Eater, soul surfing in Sword of the Sea, the biggest news stories of the week, and more. Stuff We Talked About Next week’s release highlights: Metal Eden | PS5 Hirogami | PS5 Hell Is Us | PS5 Hollow Knight: Silksong | PS5, PS4 Cronos: The New Dawn | PS5 Everybody’s Golf: Hot Shots | PS5 NBA 2K26 | PS5, PS4 Romeo is a Dead Man sneak peek — New info on combat and puzzles, along with the major story beats of its ludicrous narrative. Helldivers 2 update — Enter the Terminid Hive Worlds and battle underground monsters when the Dust Devils Premium Warbond lands September 4. Lumines Live release date  — Try out the limited-time demo for PS5 to experience the new multiplayer mode and more before the game launches on November 11. GT7 1.62 update  — Add the sleek Chevrolet Corvette CX to your collection and other eye candy with the latest batch of new vehicles. No Man’s Sky Voyagers update  — Customizable multi-crew starships are now available. Cruise the galaxy as a unit and face new challenges.. New Judas details  — See how your decisions impact gameplay and other insights from Creative Director Ken Levine. Skate hands-on  — Play Early Access starting September 16 for free and explore San Vansterdam and its many choice spots. Shinobi: Art of Vengeance dev interview  — Learn what steps were taken to create a modern take on the classic action platformer The Cast View and download image Download the image close Close Download this image Kristen Zitani –  Senior Content Communications Specialist, SIE View and download image Download the image close Close Download this image Tim Turi – Content Communications Manager, SIE View and download image Download the image close Close Download this image O’Dell Harmon Jr. – Content Communications Specialist, SIE Thanks to Dormilón for our rad theme song and show music. [Editor’s note: PSN game release dates are subject to change without notice. Game details are gathered from press releases from their individual publishers and/or ESRB rating descriptions.]
    Like
    Love
    Wow
    Angry
    Sad
    355
    · 2 Comments ·0 Shares
  • إياك تخلّي الفرصة تفوتك!

    مع اقتراب موعد صدور فيلم "Return To Silent Hill" في 23 جانفي 2026، رايحين نرجعوا لأجواء الرعب النفسي اللي عرفناها في سلسلة Silent Hill. المخرج Christophe Gans، اللي كان وراء فيلم 2006، راجع لنا مع تجربة جديدة! الفيلم يحكي عن James اللي يتلقى رسالة غامضة من حبيبته الضائعة Mary، ويدخل في عالم مخيف مليء بالكائنات المرعبة.

    كنت دايمًا أحب ألعاب Silent Hill، وذكريات الرعب اللي عشتها مع الأصحاب في السهرات. دايمًا كانت الأجواء متوترة، وقلوبنا تتسارع. هاد الفيلم الجديد يرد لنا هاد الإحساس، ونتمنى يكون عنده نفس الأثر.

    شوفوا التريلر وخلّونا نعيشوا لحظات رعب جديدة مع بعض!

    https://gameinformer.com/2025/08/27/check-out-the-official-teaser-trailer-for-silent-hill-2-movie-adaptation-return-to
    إياك تخلّي الفرصة تفوتك! 😱 مع اقتراب موعد صدور فيلم "Return To Silent Hill" في 23 جانفي 2026، رايحين نرجعوا لأجواء الرعب النفسي اللي عرفناها في سلسلة Silent Hill. المخرج Christophe Gans، اللي كان وراء فيلم 2006، راجع لنا مع تجربة جديدة! الفيلم يحكي عن James اللي يتلقى رسالة غامضة من حبيبته الضائعة Mary، ويدخل في عالم مخيف مليء بالكائنات المرعبة. 🎬🖤 كنت دايمًا أحب ألعاب Silent Hill، وذكريات الرعب اللي عشتها مع الأصحاب في السهرات. دايمًا كانت الأجواء متوترة، وقلوبنا تتسارع. هاد الفيلم الجديد يرد لنا هاد الإحساس، ونتمنى يكون عنده نفس الأثر. شوفوا التريلر وخلّونا نعيشوا لحظات رعب جديدة مع بعض! https://gameinformer.com/2025/08/27/check-out-the-official-teaser-trailer-for-silent-hill-2-movie-adaptation-return-to
    Check Out The Official Teaser Trailer For Silent Hill 2 Movie Adaptation, Return To Silent Hill
    gameinformer.com
    It's a great time to be a fan of Konami's Silent Hill series. Between Bloober Team's great Silent Hill 2 remake last year, the upcoming Silent Hill f that launches next month, and Return To Sile
    Like
    Love
    Wow
    Sad
    Angry
    1K
    · 1 Comments ·0 Shares
  • يا جماعة، شكون منكم متحمس للكرة؟ ⚽️

    اليوم جبتلكم خبر يفرح القلوب! CR Belouizdad، المعروف بـ CRB، قرر يتفاعل بعد شهر كامل من الصمت. والبارح، أعلنوا عن ثلاث لاعبين جدد في الفريق. هاذي خطوة كبيرة، خاصة مع المنافسة الشديدة في الدوري!

    أنا شخصياً، متشوق نشوف كيفاش هاذ اللاعبين الجدد راح يضيفوا للفريق. كيما تعرفوا، كل انتداب جديد يجيب معاه آمال وتطلعات. إن شاء الله يكونوا في المستوى ويعطيو أكثر للكيان الكبير تاعنا.

    ما تخليوش الفرصة تفوتكم، تابعوا الأخبار وكونوا دائماً مع الفريق.

    https://www.dzfoot.com/football-en-algerie/crb-le-chabab-officialise-ses-dernieres-recrues-283176.html?utm_source=rss_feed&utm_medium=link&utm_campaign=unknown

    #كر متابعة #CRB #FootballAlgerien #حماس #Chabab
    يا جماعة، شكون منكم متحمس للكرة؟ ⚽️ اليوم جبتلكم خبر يفرح القلوب! CR Belouizdad، المعروف بـ CRB، قرر يتفاعل بعد شهر كامل من الصمت. والبارح، أعلنوا عن ثلاث لاعبين جدد في الفريق. هاذي خطوة كبيرة، خاصة مع المنافسة الشديدة في الدوري! أنا شخصياً، متشوق نشوف كيفاش هاذ اللاعبين الجدد راح يضيفوا للفريق. كيما تعرفوا، كل انتداب جديد يجيب معاه آمال وتطلعات. إن شاء الله يكونوا في المستوى ويعطيو أكثر للكيان الكبير تاعنا. ما تخليوش الفرصة تفوتكم، تابعوا الأخبار وكونوا دائماً مع الفريق. https://www.dzfoot.com/football-en-algerie/crb-le-chabab-officialise-ses-dernieres-recrues-283176.html?utm_source=rss_feed&utm_medium=link&utm_campaign=unknown #كر متابعة #CRB #FootballAlgerien #حماس #Chabab
    www.dzfoot.com
    Après près d'un mois sans donner de nouvelles, le CR Belouizdad s'est activé aujourd'hui avec l'officialisation de trois recrues. The post CRB : Le Chabab officialise ses dernières recrues appeared first on Football Algérien - DZFOOT.COM.
    Like
    Love
    Wow
    Sad
    Angry
    907
    · 1 Comments ·0 Shares
  • Rising Heat - Official Release Date Trailer

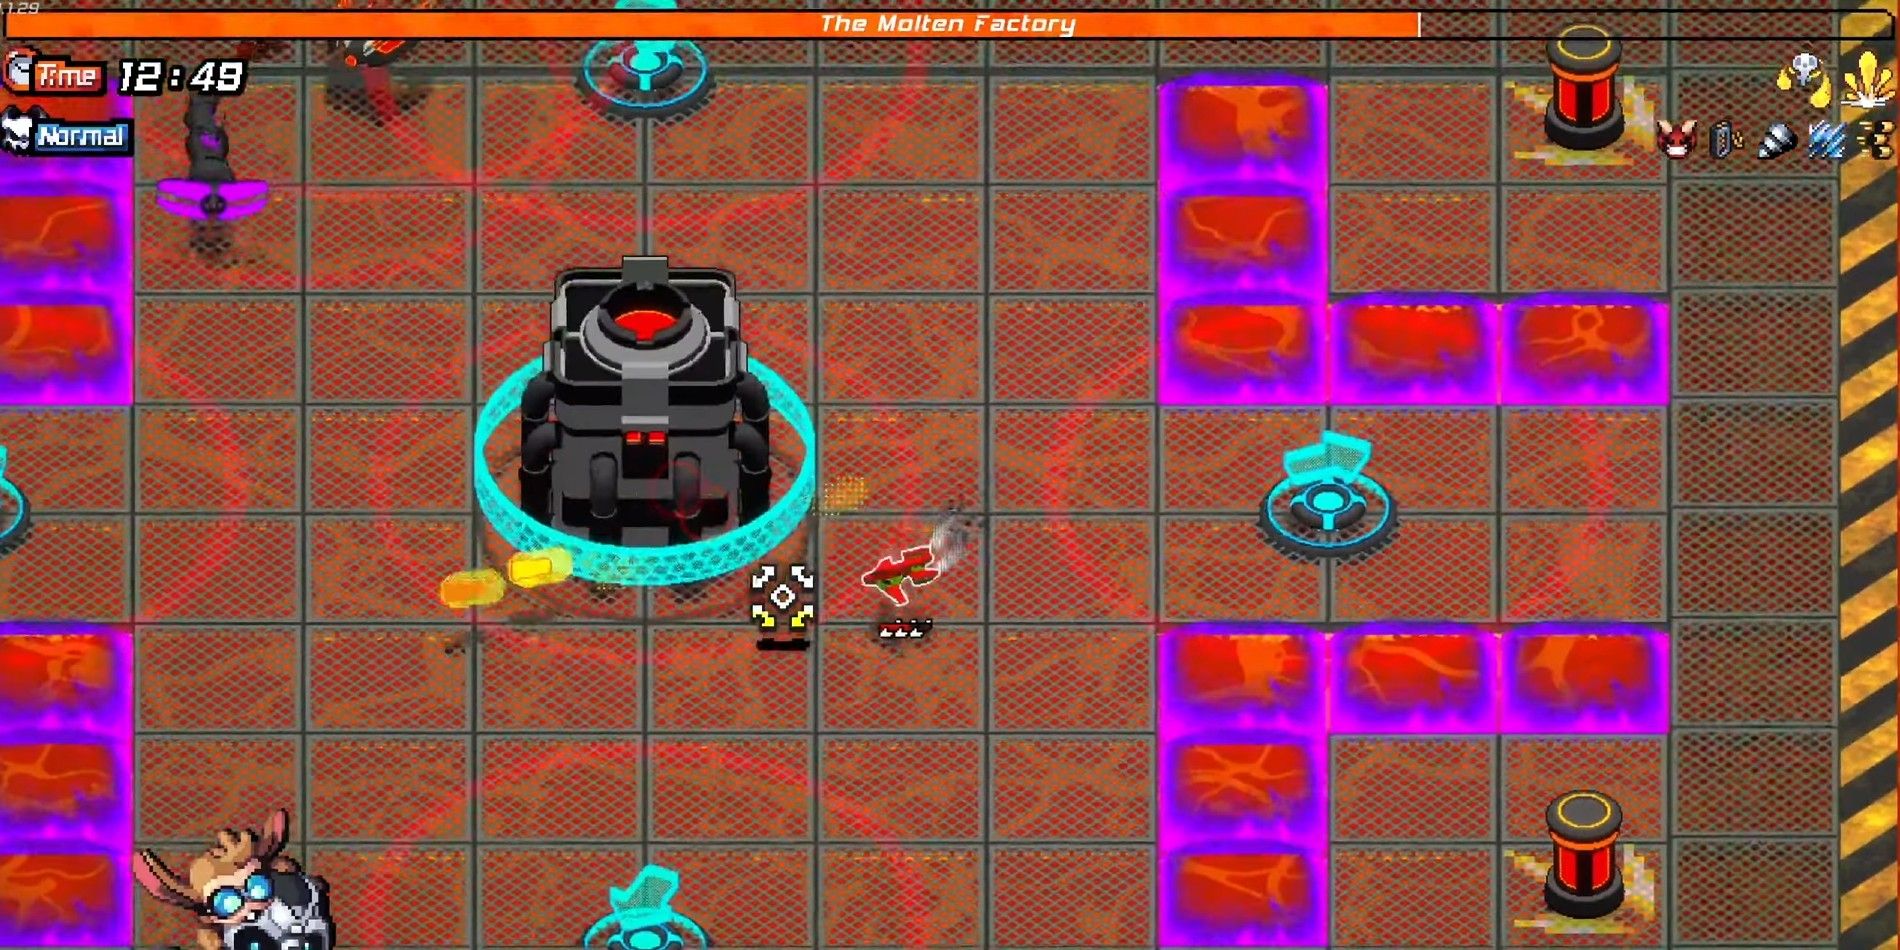
    Rising Heat is a roguelite bullet hell game developed by Fuzzy Sock Studios. See the official release date trailer here.
    #rising #heat #official #release #date
    Rising Heat - Official Release Date Trailer
    Rising Heat is a roguelite bullet hell game developed by Fuzzy Sock Studios. See the official release date trailer here. #rising #heat #official #release #date
    Rising Heat - Official Release Date Trailer
    gamerant.com
    Rising Heat is a roguelite bullet hell game developed by Fuzzy Sock Studios. See the official release date trailer here.
    Like
    Love
    Wow
    Sad
    Angry
    1K
    · 2 Comments ·0 Shares
  • New Path Of Exile 2 Update Finally Adds In-Game Market Browser

    Path of Exile 2's next update The Third Edict is set to add a whole new act, region, and plenty of other new content to the game--but it's the new asynchronous trading system that really has players excited. Grinding Gear Games has shown off the system's new in-game market browser, just days out from the update drop.GGG explains in the video that the in-game trade browser wasn't quite ready to be shown off when the studio did its initial content drop for The Third Edict, but it's now ready to go. The in-game market browser works similarly to PoE 2's official trade website, allowing players to search for items they want in the player-to-player trade system. The new asynchronous trade system means the seller no longer has to be online for a trade to take place--buyers can now purchase it directly from the seller's Hideout. The seemingly simple feature brings a major quality-of-life improvement for PoE 2 players, simplifying what was previously a fairly involved, multi-step process into an easier task. The asynchronous trade system is set to come to the original Path of Exile in future too, provided its integration into PoE 2 goes smoothly.Continue Reading at GameSpot
    #new #path #exile #update #finally
    New Path Of Exile 2 Update Finally Adds In-Game Market Browser
    Path of Exile 2's next update The Third Edict is set to add a whole new act, region, and plenty of other new content to the game--but it's the new asynchronous trading system that really has players excited. Grinding Gear Games has shown off the system's new in-game market browser, just days out from the update drop.GGG explains in the video that the in-game trade browser wasn't quite ready to be shown off when the studio did its initial content drop for The Third Edict, but it's now ready to go. The in-game market browser works similarly to PoE 2's official trade website, allowing players to search for items they want in the player-to-player trade system. The new asynchronous trade system means the seller no longer has to be online for a trade to take place--buyers can now purchase it directly from the seller's Hideout. The seemingly simple feature brings a major quality-of-life improvement for PoE 2 players, simplifying what was previously a fairly involved, multi-step process into an easier task. The asynchronous trade system is set to come to the original Path of Exile in future too, provided its integration into PoE 2 goes smoothly.Continue Reading at GameSpot #new #path #exile #update #finally
    New Path Of Exile 2 Update Finally Adds In-Game Market Browser
    www.gamespot.com
    Path of Exile 2's next update The Third Edict is set to add a whole new act, region, and plenty of other new content to the game--but it's the new asynchronous trading system that really has players excited. Grinding Gear Games has shown off the system's new in-game market browser, just days out from the update drop.GGG explains in the video that the in-game trade browser wasn't quite ready to be shown off when the studio did its initial content drop for The Third Edict, but it's now ready to go. The in-game market browser works similarly to PoE 2's official trade website, allowing players to search for items they want in the player-to-player trade system. The new asynchronous trade system means the seller no longer has to be online for a trade to take place--buyers can now purchase it directly from the seller's Hideout. The seemingly simple feature brings a major quality-of-life improvement for PoE 2 players, simplifying what was previously a fairly involved, multi-step process into an easier task. The asynchronous trade system is set to come to the original Path of Exile in future too, provided its integration into PoE 2 goes smoothly.Continue Reading at GameSpot
    Like
    Love
    Wow
    Sad
    Angry
    1K
    · 2 Comments ·0 Shares
  • Ready Set Play promotion comes to PlayStation Store Aug 27

    PlayStation Store welcomes an all-new promotion, starting August 27. For a limited time*, Ready, Set, Play will offer a vast selection of games, including blockbuster franchises, acclaimed indies and standalone greats, at discount. The question then is, where do you start?

    We’re here to help you with the answer. Browse a selection of games on offer below, then when the promotion goes live, head to PlayStation Store to discover your regional discount.

    A Fisherman’s Tale 2

    A Plague Tale: Innocence

    Abyss Odyssey: Extended Dream Edition

    AC Mirage + Valhalla Bundle

    Actraiser Renaissance

    Ad Infinitum – Nightmare Edition

    AEW: Fight Forever – Ultimate Edition

    After the Fall

    After the FallAge of Empires II: Definitive Edition Premium Edition

    Age of Mythology: Retold

    Alan Wake 2 Deluxe Edition

    Alba: A Wildlife Adventure

    Alien: Isolation – The Collection

    Aliens: Dark Descent

    Alone in the Dark – Digital Deluxe Edition

    AO Tennis 2

    Arizona Sunshine® Remake

    Arkane Collection PS5

    Assassin’s Creed III Remastered

    Assassin’s Creed IV: Black Flag

    Assassin’s Creed Odyssey – Deluxe Edition

    Assassin’s Creed Odyssey – Gold Edition

    Assassin’s Creed Origins – Deluxe Edition

    Assassin’s Creed Origins – Season Pass

    Astria Ascending

    Atomic Heart – Premium Edition

    Atomic Heart – Standard Edition

    Attractio

    Avatar: Frontiers of Pandora Deluxe Edition

    Avatar: Frontiers of Pandora Gold Edition

    Away: Journey to the Unexpected

    Balatro

    Banishers: Ghosts of New Eden

    Barbie Project Friendship™

    Batman: Arkham VR

    Call of Duty: Advanced Warfare – Digital Pro EditionCall of Duty: Black Ops 4

    Call of Duty: Black Ops III – Zombies Chronicles Edition

    Call of Duty: Infinite Warfare – Digital Deluxe Edition

    Call of Duty: WWII – Digital Deluxe

    Call of Duty®: Modern Warfare®

    Capcom Collab Pack

    Captain Tsubasa: Rise of New Champions – Deluxe Edition

    Car Mechanic Simulator 2021 DLC MegaPack

    Caravan Sandwitch

    Cassiodora

    Children of Morta

    Children of Zodiarcs

    Chroma Squad

    Chronos: Before the Ashes

    Cobra Kai 2: Dojos Rising – Nemesis Edition

    College Football 26 Deluxe Edition

    Commandos 2 & Commandos 3 – Bundle Digital

    Commandos: Origins – Deluxe Edition

    CONSCRIPT

    CRISIS CORE –FINAL FANTASY VII– REUNION DIGITAL DELUXE EDITION

    Cult of the Lamb

    Cyberpunk 2077

    CYGNI: All Guns Blazing

    Dead Island 2 Main Game

    Dead Rising 4: Frank’s Big Package

    Dead Space

    Death Stranding Director’s Cut

    DEATHLOOPDeliver At All Costs

    Demon’s Souls

    Destiny 2: Year of Prophecy Edition

    Destroy All Humans!

    Devil May Cry 4 Special Edition

    Devil May Cry HD Collection

    Diablo® IV Vessel of Hatred Deluxe Edition

    Digital Deluxe Edition

    DiRT Rally 2.0: Game of the Year Edition

    Disciples: Liberation Digital Deluxe Edition

    Dishonored 2

    Dishonored®: Death of the Outsider™ – Deluxe Bundle

    Dissidia Final Fantasy NT – Digital Deluxe Edition

    Dissidia Final Fantasy NT – Season Pass

    DmC: Devil May Cry – Definitive Edition

    DMC5SE – Complete In-game Unlock Bundle

    Downward

    Dragon Age: Inquisition Deluxe Edition

    Dragon Ball FighterZ – FighterZ Pass

    Dragon Ball FighterZDragon Ball Xenoverse

    Dragon Ball Xenoverse 2Dragon Ball Z: Kakarot – Season Pass

    Dragonage: The Veilguard – Standard Edition

    Dragon’s Dogma 2_DeluxeEdition

    Dragon’s Dogma: Dark Arisen

    DreamWorks Dragons: Legends of The Nine Realms

    DREDGE

    DREDGE: Expansion Bundle

    Duke Nukem 3D: 20th Anniversary World Tour

    Dummy Title

    Dungeon Rushers

    Dungeons 4

    Dying Light – Essentials Edition

    Elypse

    Exoprimal Survival Pass Premium Tier Bundle

    Expeditions – Supreme Edition

    Expeditions: A MudRunner Game

    F1 25

    Fabledom

    Fade to Silence

    Fallout 4 – Season Pass Bundle Re-Launch

    Fallout 4: Game of the Year Edition

    Fallout 76

    Far Cry 3: Classic Edition

    Far Cry 4

    Far Cry 5 – Season Pass

    Far Cry New Dawn – Ultimate Edition

    Far Cry® 6 – Game of the Year Edition

    FAR CRY®6 Standard Edition

    Final Fantasy VII Remake

    FINAL FANTASY VII REMAKE & REBIRTH Twin Pack

    FINAL FANTASY VII REMAKE INTERGRADE

    Fist of the North Star: Lost Paradise

    For Honor – Year 8 Standard Edition

    Forspoken Digital Deluxe Edition

    Fort Solis

    FREEDOM WARS Remastered

    Funko Fusion – Mega Man Pack Bundle

    Gangs of Sherwood

    Garden Life: A Cozy Simulator

    Genesis Alpha One Deluxe Edition

    Get Even

    Ghost of a Tale

    Ghostrunner

    Ghostrunner 2

    Ghostrunner 2 Brutal Edition

    Ghostrunner PS5

    Ghosts ‘n Goblins Resurrection

    God of War III Remastered

    Godfall Ultimate Edition

    Gord – Deluxe Edition

    Gotham Knights

    Grand Theft Auto V: Premium Edition

    Gravel – Special Edition

    GRID LegendsGRID LegendsGris

    GTA Online + Single Player Unlock PS5

    GTA Trilogy PS4 & PS5 Digital Bundle

    Handball 17

    Hatsune Miku: Project DIVA Future Tone – Season Pass

    Hellsweeper VR – Deluxe Edition

    HITMAN World of Assassination – Upgrade Pack

    Homefront: The Revolution – Expansion Pass

    Hotel Renovator – Five Star Edition

    Hotel: A Resort Simulator

    House Builder

    House Builder Overtime

    Humankind Heritage Deluxe Edition

    Hunt: Showdown 1896 – Starter Edition

    Hunt: Showdown 1986 – Premium Edition

    Hunting Simulator 2 Elite Edition

    I Am Setsuna

    Ice Age: Scrat’s Nutty Adventure

    Immortals of Aveum – Deluxe Edition

    Indiana Jones and the Great Circle

    inFAMOUS First Light

    Infinity Strash: DRAGON QUEST The Adventure of Dai

    Infinity Strash: DRAGON QUEST The Adventure of Dai – Digital Deluxe Upgrade

    Injustice: Gods Among Us – Ultimate Edition

    Inscryption

    Instant Sports Winter Games

    Insurgency: Sandstorm

    Insurgency: Sandstorm – Gold Edition

    Insurgency: Sandstorm – Year 1 Pass

    It Takes Two PS4™ & PS5™

    Jeopardy!

    Jumanji: Wild Adventures

    Just Cause 3: XXL Edition

    Just Cause 4: Reloaded

    KCD 2 Main Game

    Kill The Bad Guy

    Kingdom Come: Deliverance – DLC Collection

    Kingdom Hearts HD 1.5 + 2.5 Remix

    KINGDOM HEARTS Melody of Memory

    Kingdoms of Amalur: Re-Reckoning

    Knack 2

    KOF XV Ultimate Edition

    L.A. Noire

    Legendary Fishing

    LEGO 2K Drive

    LEGO DC Super-Villains

    LEGO DC Super-Villains – Season Pass

    LEGO Marvel Super Heroes

    LEGO Marvel Super Heroes 2

    LEGO Marvel Super Heroes 2 – Season Pass

    LEGO Star Wars: The Force Awakens Deluxe Edition

    LEGO Star Wars: The Skywalker Saga – Galactic Edition

    LEGO The Incredibles

    LEGO® 2K Drive Standard Cross-Gen Edition

    Lethis – Path of Progress

    Life is Strange: Double Exposure

    Life is Strange: Double Exposure – Ultimate Edition

    Like a Dragon: Infinite Wealth PS4&PS5

    Like a Dragon: Infinite Wealth – Ultimate Edition

    Like a Dragon: Pirate Yakuza in Hawaii Deluxe Edition

    Lords of Exile

    Lost Eidolons – Standard

    Mafia Trilogy Bundle

    Mafia: Definitive Edition

    Mahjong

    Marvel’s Midnight Suns for PS4™

    Marvel’s Spider-Man – The City That Never Sleeps

    Mass Effect™ Legendary Edition

    Medieval Dynasty

    Mega Man Legacy Collection

    Mega Man Legacy Collection 2

    Mega Man X Legacy Collection

    Mega Man X Legacy Collection 2

    Mega Man Zero/ZX Legacy Collection

    Megaman Battle Network Legacy CollectionMerchant of the Skies

    Metal Wolf Chaos XD

    Metro 2033 Redux

    Metro Awakening

    Metro Awakening + Arizona Sunshine® 2

    Metro Exodus: Gold Edition

    Metro Saga Bundle

    Metro: Last Light Redux

    Middle-earth: Shadow of Mordor – Game of the Year Edition

    Middle-earth: Shadow of War – Definitive Edition

    Mindcop

    Minit

    Miraculous: Rise of the Sphinx

    Momonga Pinball Adventures

    Monopoly 2024

    Monster Energy Supercross: The Official Video Game 2

    Monster Energy Supercross: The Official Video Game 2 – Special Edition

    Monster High™ Skulltimate Secrets™

    Monster Jam Steel Titans

    Monster of the Deep: Final Fantasy XV

    Monster Truck Championship Rebel Hunter Edition

    Mortal Kombat 1

    Mortal Kombat 1: Definitive Edition Upgrade

    Mortal Kombat 11

    Mortal Kombat 11 Ultimate Add-On Bundle

    MotoGP 17

    Motorcycle Club

    Moving Out

    Moving Out + Moving Out 2 Bundle

    MudRunner – American Wilds Edition

    MXGP 2020 – The Official Motocross Videogame

    My Fantastic Ranch: Unicorn & Dragons

    My Friend Peppa Pig

    My Hero One’s Justice

    MY LITTLE PONY: A Maretime Bay Adventure

    Naruto Shippuden: Ultimate Ninja Storm 2

    Naruto Shippuden: Ultimate Ninja Storm 3 Full Burst

    Naruto to Boruto: Shinobi Striker – Deluxe Edition

    Naruto: Ultimate Ninja Storm

    NBK Dungeon Master

    Need for Speed UnboundNeed for Speed™ Hot Pursuit Remastered

    Neon Abyss

    NeuroVoider

    New Tales from the Borderlands

    NFS Unbound – Complete Edition

    Ni no Kuni II: Revenant Kingdom

    Ni no Kuni II: Revenant Kingdom – Season Pass

    Nick Jr. Party Adventure

    Nickelodeon Kart Racers 3: Slime SpeedwayNioh

    No Man’s Sky PS4 & PS5

    Nobody Wants to Die

    Nocturnal

    Nova Strike

    OCTOPATH TRAVELER + OCTOPATH TRAVELER II Bundle

    Oh My Godheads

    OlliOlli World

    One Piece: Burning Blood

    One Piece: Grand Cruise

    One Piece: Pirate Warriors 4 – Deluxe Edition

    One Piece: World Seeker – Deluxe Edition

    Oninaki

    Out Of Space: Couch Edition

    OUTRIDERS PS4 & PS5

    Overcooked!

    Overcooked! All You Can Eat

    Overpass 2

    OVERPASS Deluxe Edition

    PAW Patrol Mighty Pups Adventure Bay

    Paw Patrol: Grand Prix

    Persona 3: Dancing in Moonlight

    Persona 4 Arena Ultimax

    Persona 5: Dancing in Starlight

    PGA TOUR 2K25

    PGA TOUR 2K25 Legend Edition

    Phoenix Wright: Ace Attorney Trilogy

    Pillars of Eternity: Complete Edition

    PJ Masks Power Heroes: Mighty Alliance

    Plants vs. Zombies: Garden Warfare 2

    Portal Knights: Legendary Edition

    Portkey Games Hogwarts Legacy

    Powerwash Simulator

    Pure Farming 2018 – Deluxe Edition

    Puyo Puyo Champions

    Puyo Puyo Tetris

    Puyo Puyo Tetris 2 PS4 & PS5

    Rabbids Invasion – Gold Edition

    Rabbids Party of Legends

    RAD

    RAGE 2: Deluxe Edition

    Railway Empire 2

    RAINBOW HIGH™: RUNWAY RUSH

    Rainbow Six Extraction Deluxe Edition

    Rainbow Six Extraction Standard Edition

    Ratchet & Clank: Rift Apart

    Rayman Legends

    Ready or Not

    Ready or Not: Digital Deluxe Edition

    Ready or Not: Mission Pass

    Recompile

    Red Dead Online

    Red Dead Redemption 2

    Red Dead Redemption 2: Story Mode

    Remnant: From the Ashes – Complete Edition

    Returnal Digital Deluxe Edition

    Ride 3

    RiMS Racing

    Risen

    Risen 3: Titan Lords – Enhanced Edition

    Risk of Rain

    Risk of Rain 2

    RoadCraft

    RoboCop: Rogue City

    Rogue Spirit

    Romancing SaGa -Minstrel Song- Remastered PS4 & PS5

    Ryan’s Rescue Squad

    SaGa Emerald Beyond PS5&PS4

    Saints Row

    SCARLET NEXUS Ultimate Edition

    Sea of Thieves: 2025 Premium Edition

    SERIAL CLEANERS

    Session – Year One Complete Edition

    Shape of the World

    Shattered: Tale of the Forgotten King

    Shin Megami Tensei III Nocturne HD Remaster

    Ship of Fools

    Sid Meier’s Civilization® VIISkabma – Snowfall

    Skull & Bones

    Skyrim Anniversary Edition + Fallout 4 G.O.T.Y Bundle

    Sniper Elite V2 Remastered

    Sniper Elite: Resistance Deluxe Edition

    SnowRunner – 2 Year Anniversary Edition

    Solitaire

    Sonic Forces

    Soulcalibur VI – Deluxe Edition

    Souldiers

    South of the Circle

    South Park: The Fractured but Whole

    South Park: The Fractured but Whole – Season Pass

    Spacebase Startopia – PS4 & PS5

    Spirit Mancer

    Spirit of the Island

    Splasher

    SpongeBob SquarePants: Battle for Bikini Bottom – Rehydrated

    SpongeBob SquarePants: The Cosmic Shake

    STAR OCEAN THE DIVINE FORCE

    Star Ocean: First Departure R

    Star Ocean: Integrity and Faithlessness – Digital Edition

    Star Trek Prodigy: Supernova

    Star Wars Battlefront II

    Star Wars Outlaws – Ultimate Edition

    STAR WARS™: Squadrons

    Stellar Blade Complete Edition

    Steredenn: Binary Stars

    Stray Blade

    Strider

    Strikers Edge

    Subnautica

    Sudden Strike 4: Complete Collection

    Suicide Squad: Kill the Justice League

    Super Bomberman R

    Sword Art Online: Lost Song

    SYNDUALITY:Echo of Ada

    Tales of Graces f Remastered

    Tales of Kenzera™: ZAU

    TEKKEN 8

    Tennis World Tour 2 Ace Edition

    Terra Memoria

    Test Drive Unlimited Solar Crown – Gold Edition

    Test Drive Unlimited Solar Crown – Silver Street Edition

    TH34R – Standard Edition Bundle

    That Time I Got Reincarnated as a Slime ISEKAI Chronicles

    That’s My Family: Family Fun Night

    The 7th Guest VR

    The Arkane Collection PS4

    The Crew: Motorfest Gold Edition Year 2

    The Dark Pictures Anthology: House of Ashes

    The DioField Chronicle PS4 & PS5

    The Disney Afternoon Collection

    The Dungeon of Naheulbeuk: The Amulet of Chaos

    The Elder Scrolls IV: Oblivion Remastered

    The Evil Within Season Pass

    The Inquisitor

    The Invincible

    The Jak and Daxter Collection

    The King of Fighters XIV

    THE KING OF FIGHTERS XV

    The Land Beneath Us

    The Last Campfire

    The Last Door: Complete Edition

    The Last Remnant Remastered

    The LEGO Movie Videogame

    The Order: 1886

    The Outlast Trials

    The Patrick Star Game

    The Quarry

    The Seven Deadly Sins: Knights of Britannia

    The Surge 2 – Premium Edition

    The Surge: Augmented Edition

    The Survivalists – Deluxe Edition

    The Talos Principle 2

    The Witcher 3: Wild Hunt

    The Wizards – Dark Times: Brotherhood

    THEATRHYTHM FINAL BAR LINE

    THEATRHYTHM FINAL BAR LINE Digital Deluxe Upgrade

    THEATRHYTHM FINAL BAR LINE Premium Digital Deluxe Edition

    TIEBREAK: Official game of the ATP and WTA

    TimeSplitters

    TimeSplitters 2

    Tiny Tina’s Wonderlands

    Tiny Tina’s Wonderlands: Chaotic Great Edition

    TMNT: Mutants Unleashed

    Tokyo Ghoul: re Call to Exist

    Tom Clancy’s Ghost Recon Breakpoint: Deluxe Edition 2021

    Tom Clancy’s Ghost Recon Breakpoint: Gold Edition

    Tom Clancy’s Ghost Recon: Wildlands – Season Pass

    TopSpin 2K25 – Cross-Gen Edition

    TopSpin 2K25 – Grand Slam Edition

    Tour de France 2025 – Deluxe Edition

    Train Life – A Railway Simulator PS4

    Train Life – A Railway Simulator PS5

    TRANSFORMERS: EARTHSPARK – Expedition

    Trepang2

    Trials of Mana

    Tribes of Midgard Digital Deluxe

    Trine 5

    Trivial Pursuit Live! 2

    Tropico 5

    Tropico 5 – Complete Collection Upgrade Pack

    Tropico 6 – Next Gen Edition

    TT Isle Of Man 3 – Racing Fan Edition

    TT Isle of Man: Ride on the Edge

    Type:Rider

    UFC® 5 PS5

    Umbrella Corps

    Umbrella Corps – Deluxe Edition

    Underworld Ascendant

    Unheard – Voices of Crime

    Unknown 9

    Uno – Standard Edition Cross-buy

    Unturned

    Valkyria Chronicles Remastered

    Vanguard – Cross-Gen Edition

    Vanguard – PS5 Cross-Gen Edition

    Vernal Edge

    Voice of Cards Trilogy + DLC set

    Voice of Cards: The Beast of Burden + DLC set

    Voice of Cards: The Isle Dragon Roars + DLC set

    V-Rally 4 – Ultimate Edition

    War Hospital

    Warhammer 40,000: Inquisitor – Martyr: Complete Collection

    Warhammer 40,000: Space Marine 2

    Warhammer Ultimate Pack: Hack and Slash

    Warhammer: Chaosbane

    Warhammer: Chaosbane Slayer Edition

    Welcome to ParadiZe – Zombot Edition

    Werewolf: The Apocalypse – Earthblood

    Werewolf: The Apocalypse – Earthblood Champion of Gaia

    Wild Hearts Karakuri Edition Bundle

    Wildshade: Unicorn Champions

    Wolfenstein: Resistance Bundle

    Wolfenstein: Youngblood – Deluxe Edition

    Worms Rumble PS4 & PS5

    WRC 2023WRC 9 FIA World Rally Championship PS4

    WRC 9 FIA World Rally Championship PS5

    WRC Generations – The FIA WRC Official Game

    Yakuza Complete Collection

    Yakuza: Like a Dragon Legendary Hero Edition

    Yakuza: Like a Dragon Legendary Hero Edition PS4 & PS5

    Yakuza: Like a Dragon PS4 & PS5

    Zombie Army Trilogy

    Zone of the Enders: The 2nd Runner – Mars

    *Ready Set Play promotion is live on PlayStation Store from Wednesday, August 27 at 00:00 AM PDT/BST/JST and finishes Wednesday September 10 at 11:59 PM PDT/BST/JST.
    #ready #set #play #promotion #comes
    Ready Set Play promotion comes to PlayStation Store Aug 27
    PlayStation Store welcomes an all-new promotion, starting August 27. For a limited time*, Ready, Set, Play will offer a vast selection of games, including blockbuster franchises, acclaimed indies and standalone greats, at discount. The question then is, where do you start? We’re here to help you with the answer. Browse a selection of games on offer below, then when the promotion goes live, head to PlayStation Store to discover your regional discount. A Fisherman’s Tale 2 A Plague Tale: Innocence Abyss Odyssey: Extended Dream Edition AC Mirage + Valhalla Bundle Actraiser Renaissance Ad Infinitum – Nightmare Edition AEW: Fight Forever – Ultimate Edition After the Fall After the FallAge of Empires II: Definitive Edition Premium Edition Age of Mythology: Retold Alan Wake 2 Deluxe Edition Alba: A Wildlife Adventure Alien: Isolation – The Collection Aliens: Dark Descent Alone in the Dark – Digital Deluxe Edition AO Tennis 2 Arizona Sunshine® Remake Arkane Collection PS5 Assassin’s Creed III Remastered Assassin’s Creed IV: Black Flag Assassin’s Creed Odyssey – Deluxe Edition Assassin’s Creed Odyssey – Gold Edition Assassin’s Creed Origins – Deluxe Edition Assassin’s Creed Origins – Season Pass Astria Ascending Atomic Heart – Premium Edition Atomic Heart – Standard Edition Attractio Avatar: Frontiers of Pandora Deluxe Edition Avatar: Frontiers of Pandora Gold Edition Away: Journey to the Unexpected Balatro Banishers: Ghosts of New Eden Barbie Project Friendship™ Batman: Arkham VR Call of Duty: Advanced Warfare – Digital Pro EditionCall of Duty: Black Ops 4 Call of Duty: Black Ops III – Zombies Chronicles Edition Call of Duty: Infinite Warfare – Digital Deluxe Edition Call of Duty: WWII – Digital Deluxe Call of Duty®: Modern Warfare® Capcom Collab Pack Captain Tsubasa: Rise of New Champions – Deluxe Edition Car Mechanic Simulator 2021 DLC MegaPack Caravan Sandwitch Cassiodora Children of Morta Children of Zodiarcs Chroma Squad Chronos: Before the Ashes Cobra Kai 2: Dojos Rising – Nemesis Edition College Football 26 Deluxe Edition Commandos 2 & Commandos 3 – Bundle Digital Commandos: Origins – Deluxe Edition CONSCRIPT CRISIS CORE –FINAL FANTASY VII– REUNION DIGITAL DELUXE EDITION Cult of the Lamb Cyberpunk 2077 CYGNI: All Guns Blazing Dead Island 2 Main Game Dead Rising 4: Frank’s Big Package Dead Space Death Stranding Director’s Cut DEATHLOOPDeliver At All Costs Demon’s Souls Destiny 2: Year of Prophecy Edition Destroy All Humans! Devil May Cry 4 Special Edition Devil May Cry HD Collection Diablo® IV Vessel of Hatred Deluxe Edition Digital Deluxe Edition DiRT Rally 2.0: Game of the Year Edition Disciples: Liberation Digital Deluxe Edition Dishonored 2 Dishonored®: Death of the Outsider™ – Deluxe Bundle Dissidia Final Fantasy NT – Digital Deluxe Edition Dissidia Final Fantasy NT – Season Pass DmC: Devil May Cry – Definitive Edition DMC5SE – Complete In-game Unlock Bundle Downward Dragon Age: Inquisition Deluxe Edition Dragon Ball FighterZ – FighterZ Pass Dragon Ball FighterZDragon Ball Xenoverse Dragon Ball Xenoverse 2Dragon Ball Z: Kakarot – Season Pass Dragonage: The Veilguard – Standard Edition Dragon’s Dogma 2_DeluxeEdition Dragon’s Dogma: Dark Arisen DreamWorks Dragons: Legends of The Nine Realms DREDGE DREDGE: Expansion Bundle Duke Nukem 3D: 20th Anniversary World Tour Dummy Title Dungeon Rushers Dungeons 4 Dying Light – Essentials Edition Elypse Exoprimal Survival Pass Premium Tier Bundle Expeditions – Supreme Edition Expeditions: A MudRunner Game F1 25 Fabledom Fade to Silence Fallout 4 – Season Pass Bundle Re-Launch Fallout 4: Game of the Year Edition Fallout 76 Far Cry 3: Classic Edition Far Cry 4 Far Cry 5 – Season Pass Far Cry New Dawn – Ultimate Edition Far Cry® 6 – Game of the Year Edition FAR CRY®6 Standard Edition Final Fantasy VII Remake FINAL FANTASY VII REMAKE & REBIRTH Twin Pack FINAL FANTASY VII REMAKE INTERGRADE Fist of the North Star: Lost Paradise For Honor – Year 8 Standard Edition Forspoken Digital Deluxe Edition Fort Solis FREEDOM WARS Remastered Funko Fusion – Mega Man Pack Bundle Gangs of Sherwood Garden Life: A Cozy Simulator Genesis Alpha One Deluxe Edition Get Even Ghost of a Tale Ghostrunner Ghostrunner 2 Ghostrunner 2 Brutal Edition Ghostrunner PS5 Ghosts ‘n Goblins Resurrection God of War III Remastered Godfall Ultimate Edition Gord – Deluxe Edition Gotham Knights Grand Theft Auto V: Premium Edition Gravel – Special Edition GRID LegendsGRID LegendsGris GTA Online + Single Player Unlock PS5 GTA Trilogy PS4 & PS5 Digital Bundle Handball 17 Hatsune Miku: Project DIVA Future Tone – Season Pass Hellsweeper VR – Deluxe Edition HITMAN World of Assassination – Upgrade Pack Homefront: The Revolution – Expansion Pass Hotel Renovator – Five Star Edition Hotel: A Resort Simulator House Builder House Builder Overtime Humankind Heritage Deluxe Edition Hunt: Showdown 1896 – Starter Edition Hunt: Showdown 1986 – Premium Edition Hunting Simulator 2 Elite Edition I Am Setsuna Ice Age: Scrat’s Nutty Adventure Immortals of Aveum – Deluxe Edition Indiana Jones and the Great Circle inFAMOUS First Light Infinity Strash: DRAGON QUEST The Adventure of Dai Infinity Strash: DRAGON QUEST The Adventure of Dai – Digital Deluxe Upgrade Injustice: Gods Among Us – Ultimate Edition Inscryption Instant Sports Winter Games Insurgency: Sandstorm Insurgency: Sandstorm – Gold Edition Insurgency: Sandstorm – Year 1 Pass It Takes Two PS4™ & PS5™ Jeopardy! Jumanji: Wild Adventures Just Cause 3: XXL Edition Just Cause 4: Reloaded KCD 2 Main Game Kill The Bad Guy Kingdom Come: Deliverance – DLC Collection Kingdom Hearts HD 1.5 + 2.5 Remix KINGDOM HEARTS Melody of Memory Kingdoms of Amalur: Re-Reckoning Knack 2 KOF XV Ultimate Edition L.A. Noire Legendary Fishing LEGO 2K Drive LEGO DC Super-Villains LEGO DC Super-Villains – Season Pass LEGO Marvel Super Heroes LEGO Marvel Super Heroes 2 LEGO Marvel Super Heroes 2 – Season Pass LEGO Star Wars: The Force Awakens Deluxe Edition LEGO Star Wars: The Skywalker Saga – Galactic Edition LEGO The Incredibles LEGO® 2K Drive Standard Cross-Gen Edition Lethis – Path of Progress Life is Strange: Double Exposure Life is Strange: Double Exposure – Ultimate Edition Like a Dragon: Infinite Wealth PS4&PS5 Like a Dragon: Infinite Wealth – Ultimate Edition Like a Dragon: Pirate Yakuza in Hawaii Deluxe Edition Lords of Exile Lost Eidolons – Standard Mafia Trilogy Bundle Mafia: Definitive Edition Mahjong Marvel’s Midnight Suns for PS4™ Marvel’s Spider-Man – The City That Never Sleeps Mass Effect™ Legendary Edition Medieval Dynasty Mega Man Legacy Collection Mega Man Legacy Collection 2 Mega Man X Legacy Collection Mega Man X Legacy Collection 2 Mega Man Zero/ZX Legacy Collection Megaman Battle Network Legacy CollectionMerchant of the Skies Metal Wolf Chaos XD Metro 2033 Redux Metro Awakening Metro Awakening + Arizona Sunshine® 2 Metro Exodus: Gold Edition Metro Saga Bundle Metro: Last Light Redux Middle-earth: Shadow of Mordor – Game of the Year Edition Middle-earth: Shadow of War – Definitive Edition Mindcop Minit Miraculous: Rise of the Sphinx Momonga Pinball Adventures Monopoly 2024 Monster Energy Supercross: The Official Video Game 2 Monster Energy Supercross: The Official Video Game 2 – Special Edition Monster High™ Skulltimate Secrets™ Monster Jam Steel Titans Monster of the Deep: Final Fantasy XV Monster Truck Championship Rebel Hunter Edition Mortal Kombat 1 Mortal Kombat 1: Definitive Edition Upgrade Mortal Kombat 11 Mortal Kombat 11 Ultimate Add-On Bundle MotoGP 17 Motorcycle Club Moving Out Moving Out + Moving Out 2 Bundle MudRunner – American Wilds Edition MXGP 2020 – The Official Motocross Videogame My Fantastic Ranch: Unicorn & Dragons My Friend Peppa Pig My Hero One’s Justice MY LITTLE PONY: A Maretime Bay Adventure Naruto Shippuden: Ultimate Ninja Storm 2 Naruto Shippuden: Ultimate Ninja Storm 3 Full Burst Naruto to Boruto: Shinobi Striker – Deluxe Edition Naruto: Ultimate Ninja Storm NBK Dungeon Master Need for Speed UnboundNeed for Speed™ Hot Pursuit Remastered Neon Abyss NeuroVoider New Tales from the Borderlands NFS Unbound – Complete Edition Ni no Kuni II: Revenant Kingdom Ni no Kuni II: Revenant Kingdom – Season Pass Nick Jr. Party Adventure Nickelodeon Kart Racers 3: Slime SpeedwayNioh No Man’s Sky PS4 & PS5 Nobody Wants to Die Nocturnal Nova Strike OCTOPATH TRAVELER + OCTOPATH TRAVELER II Bundle Oh My Godheads OlliOlli World One Piece: Burning Blood One Piece: Grand Cruise One Piece: Pirate Warriors 4 – Deluxe Edition One Piece: World Seeker – Deluxe Edition Oninaki Out Of Space: Couch Edition OUTRIDERS PS4 & PS5 Overcooked! Overcooked! All You Can Eat Overpass 2 OVERPASS Deluxe Edition PAW Patrol Mighty Pups Adventure Bay Paw Patrol: Grand Prix Persona 3: Dancing in Moonlight Persona 4 Arena Ultimax Persona 5: Dancing in Starlight PGA TOUR 2K25 PGA TOUR 2K25 Legend Edition Phoenix Wright: Ace Attorney Trilogy Pillars of Eternity: Complete Edition PJ Masks Power Heroes: Mighty Alliance Plants vs. Zombies: Garden Warfare 2 Portal Knights: Legendary Edition Portkey Games Hogwarts Legacy Powerwash Simulator Pure Farming 2018 – Deluxe Edition Puyo Puyo Champions Puyo Puyo Tetris Puyo Puyo Tetris 2 PS4 & PS5 Rabbids Invasion – Gold Edition Rabbids Party of Legends RAD RAGE 2: Deluxe Edition Railway Empire 2 RAINBOW HIGH™: RUNWAY RUSH Rainbow Six Extraction Deluxe Edition Rainbow Six Extraction Standard Edition Ratchet & Clank: Rift Apart Rayman Legends Ready or Not Ready or Not: Digital Deluxe Edition Ready or Not: Mission Pass Recompile Red Dead Online Red Dead Redemption 2 Red Dead Redemption 2: Story Mode Remnant: From the Ashes – Complete Edition Returnal Digital Deluxe Edition Ride 3 RiMS Racing Risen Risen 3: Titan Lords – Enhanced Edition Risk of Rain Risk of Rain 2 RoadCraft RoboCop: Rogue City Rogue Spirit Romancing SaGa -Minstrel Song- Remastered PS4 & PS5 Ryan’s Rescue Squad SaGa Emerald Beyond PS5&PS4 Saints Row SCARLET NEXUS Ultimate Edition Sea of Thieves: 2025 Premium Edition SERIAL CLEANERS Session – Year One Complete Edition Shape of the World Shattered: Tale of the Forgotten King Shin Megami Tensei III Nocturne HD Remaster Ship of Fools Sid Meier’s Civilization® VIISkabma – Snowfall Skull & Bones Skyrim Anniversary Edition + Fallout 4 G.O.T.Y Bundle Sniper Elite V2 Remastered Sniper Elite: Resistance Deluxe Edition SnowRunner – 2 Year Anniversary Edition Solitaire Sonic Forces Soulcalibur VI – Deluxe Edition Souldiers South of the Circle South Park: The Fractured but Whole South Park: The Fractured but Whole – Season Pass Spacebase Startopia – PS4 & PS5 Spirit Mancer Spirit of the Island Splasher SpongeBob SquarePants: Battle for Bikini Bottom – Rehydrated SpongeBob SquarePants: The Cosmic Shake STAR OCEAN THE DIVINE FORCE Star Ocean: First Departure R Star Ocean: Integrity and Faithlessness – Digital Edition Star Trek Prodigy: Supernova Star Wars Battlefront II Star Wars Outlaws – Ultimate Edition STAR WARS™: Squadrons Stellar Blade Complete Edition Steredenn: Binary Stars Stray Blade Strider Strikers Edge Subnautica Sudden Strike 4: Complete Collection Suicide Squad: Kill the Justice League Super Bomberman R Sword Art Online: Lost Song SYNDUALITY:Echo of Ada Tales of Graces f Remastered Tales of Kenzera™: ZAU TEKKEN 8 Tennis World Tour 2 Ace Edition Terra Memoria Test Drive Unlimited Solar Crown – Gold Edition Test Drive Unlimited Solar Crown – Silver Street Edition TH34R – Standard Edition Bundle That Time I Got Reincarnated as a Slime ISEKAI Chronicles That’s My Family: Family Fun Night The 7th Guest VR The Arkane Collection PS4 The Crew: Motorfest Gold Edition Year 2 The Dark Pictures Anthology: House of Ashes The DioField Chronicle PS4 & PS5 The Disney Afternoon Collection The Dungeon of Naheulbeuk: The Amulet of Chaos The Elder Scrolls IV: Oblivion Remastered The Evil Within Season Pass The Inquisitor The Invincible The Jak and Daxter Collection The King of Fighters XIV THE KING OF FIGHTERS XV The Land Beneath Us The Last Campfire The Last Door: Complete Edition The Last Remnant Remastered The LEGO Movie Videogame The Order: 1886 The Outlast Trials The Patrick Star Game The Quarry The Seven Deadly Sins: Knights of Britannia The Surge 2 – Premium Edition The Surge: Augmented Edition The Survivalists – Deluxe Edition The Talos Principle 2 The Witcher 3: Wild Hunt The Wizards – Dark Times: Brotherhood THEATRHYTHM FINAL BAR LINE THEATRHYTHM FINAL BAR LINE Digital Deluxe Upgrade THEATRHYTHM FINAL BAR LINE Premium Digital Deluxe Edition TIEBREAK: Official game of the ATP and WTA TimeSplitters TimeSplitters 2 Tiny Tina’s Wonderlands Tiny Tina’s Wonderlands: Chaotic Great Edition TMNT: Mutants Unleashed Tokyo Ghoul: re Call to Exist Tom Clancy’s Ghost Recon Breakpoint: Deluxe Edition 2021 Tom Clancy’s Ghost Recon Breakpoint: Gold Edition Tom Clancy’s Ghost Recon: Wildlands – Season Pass TopSpin 2K25 – Cross-Gen Edition TopSpin 2K25 – Grand Slam Edition Tour de France 2025 – Deluxe Edition Train Life – A Railway Simulator PS4 Train Life – A Railway Simulator PS5 TRANSFORMERS: EARTHSPARK – Expedition Trepang2 Trials of Mana Tribes of Midgard Digital Deluxe Trine 5 Trivial Pursuit Live! 2 Tropico 5 Tropico 5 – Complete Collection Upgrade Pack Tropico 6 – Next Gen Edition TT Isle Of Man 3 – Racing Fan Edition TT Isle of Man: Ride on the Edge Type:Rider UFC® 5 PS5 Umbrella Corps Umbrella Corps – Deluxe Edition Underworld Ascendant Unheard – Voices of Crime Unknown 9 Uno – Standard Edition Cross-buy Unturned Valkyria Chronicles Remastered Vanguard – Cross-Gen Edition Vanguard – PS5 Cross-Gen Edition Vernal Edge Voice of Cards Trilogy + DLC set Voice of Cards: The Beast of Burden + DLC set Voice of Cards: The Isle Dragon Roars + DLC set V-Rally 4 – Ultimate Edition War Hospital Warhammer 40,000: Inquisitor – Martyr: Complete Collection Warhammer 40,000: Space Marine 2 Warhammer Ultimate Pack: Hack and Slash Warhammer: Chaosbane Warhammer: Chaosbane Slayer Edition Welcome to ParadiZe – Zombot Edition Werewolf: The Apocalypse – Earthblood Werewolf: The Apocalypse – Earthblood Champion of Gaia Wild Hearts Karakuri Edition Bundle Wildshade: Unicorn Champions Wolfenstein: Resistance Bundle Wolfenstein: Youngblood – Deluxe Edition Worms Rumble PS4 & PS5 WRC 2023WRC 9 FIA World Rally Championship PS4 WRC 9 FIA World Rally Championship PS5 WRC Generations – The FIA WRC Official Game Yakuza Complete Collection Yakuza: Like a Dragon Legendary Hero Edition Yakuza: Like a Dragon Legendary Hero Edition PS4 & PS5 Yakuza: Like a Dragon PS4 & PS5 Zombie Army Trilogy Zone of the Enders: The 2nd Runner – Mars *Ready Set Play promotion is live on PlayStation Store from Wednesday, August 27 at 00:00 AM PDT/BST/JST and finishes Wednesday September 10 at 11:59 PM PDT/BST/JST. #ready #set #play #promotion #comes
    Ready Set Play promotion comes to PlayStation Store Aug 27
    blog.playstation.com
    PlayStation Store welcomes an all-new promotion, starting August 27. For a limited time*, Ready, Set, Play will offer a vast selection of games, including blockbuster franchises, acclaimed indies and standalone greats, at discount. The question then is, where do you start? We’re here to help you with the answer. Browse a selection of games on offer below, then when the promotion goes live, head to PlayStation Store to discover your regional discount. A Fisherman’s Tale 2 A Plague Tale: Innocence Abyss Odyssey: Extended Dream Edition AC Mirage + Valhalla Bundle Actraiser Renaissance Ad Infinitum – Nightmare Edition AEW: Fight Forever – Ultimate Edition After the Fall After the Fall (PSVR2 standard edition) Age of Empires II: Definitive Edition Premium Edition Age of Mythology: Retold Alan Wake 2 Deluxe Edition Alba: A Wildlife Adventure Alien: Isolation – The Collection Aliens: Dark Descent Alone in the Dark – Digital Deluxe Edition AO Tennis 2 Arizona Sunshine® Remake Arkane Collection PS5 Assassin’s Creed III Remastered Assassin’s Creed IV: Black Flag Assassin’s Creed Odyssey – Deluxe Edition Assassin’s Creed Odyssey – Gold Edition Assassin’s Creed Origins – Deluxe Edition Assassin’s Creed Origins – Season Pass Astria Ascending Atomic Heart – Premium Edition Atomic Heart – Standard Edition Attractio Avatar: Frontiers of Pandora Deluxe Edition Avatar: Frontiers of Pandora Gold Edition Away: Journey to the Unexpected Balatro Banishers: Ghosts of New Eden Barbie Project Friendship™ Batman: Arkham VR Call of Duty: Advanced Warfare – Digital Pro Edition (Day Zero) Call of Duty: Black Ops 4 Call of Duty: Black Ops III – Zombies Chronicles Edition Call of Duty: Infinite Warfare – Digital Deluxe Edition Call of Duty: WWII – Digital Deluxe Call of Duty®: Modern Warfare® Capcom Collab Pack Captain Tsubasa: Rise of New Champions – Deluxe Edition Car Mechanic Simulator 2021 DLC MegaPack Caravan Sandwitch Cassiodora Children of Morta Children of Zodiarcs Chroma Squad Chronos: Before the Ashes Cobra Kai 2: Dojos Rising – Nemesis Edition College Football 26 Deluxe Edition Commandos 2 & Commandos 3 – Bundle Digital Commandos: Origins – Deluxe Edition CONSCRIPT CRISIS CORE –FINAL FANTASY VII– REUNION DIGITAL DELUXE EDITION Cult of the Lamb Cyberpunk 2077 CYGNI: All Guns Blazing Dead Island 2 Main Game Dead Rising 4: Frank’s Big Package Dead Space Death Stranding Director’s Cut DEATHLOOP (GAME) Deliver At All Costs Demon’s Souls Destiny 2: Year of Prophecy Edition Destroy All Humans! Devil May Cry 4 Special Edition Devil May Cry HD Collection Diablo® IV Vessel of Hatred Deluxe Edition Digital Deluxe Edition DiRT Rally 2.0: Game of the Year Edition Disciples: Liberation Digital Deluxe Edition Dishonored 2 Dishonored®: Death of the Outsider™ – Deluxe Bundle Dissidia Final Fantasy NT – Digital Deluxe Edition Dissidia Final Fantasy NT – Season Pass DmC: Devil May Cry – Definitive Edition DMC5SE – Complete In-game Unlock Bundle Downward Dragon Age: Inquisition Deluxe Edition Dragon Ball FighterZ – FighterZ Pass Dragon Ball FighterZ (PS4 product) Dragon Ball Xenoverse Dragon Ball Xenoverse 2 (NEW Full Game PRODUCT) Dragon Ball Z: Kakarot – Season Pass Dragonage: The Veilguard – Standard Edition Dragon’s Dogma 2_DeluxeEdition Dragon’s Dogma: Dark Arisen DreamWorks Dragons: Legends of The Nine Realms DREDGE DREDGE: Expansion Bundle Duke Nukem 3D: 20th Anniversary World Tour Dummy Title Dungeon Rushers Dungeons 4 Dying Light – Essentials Edition Elypse Exoprimal Survival Pass Premium Tier Bundle Expeditions – Supreme Edition Expeditions: A MudRunner Game F1 25 Fabledom Fade to Silence Fallout 4 – Season Pass Bundle Re-Launch Fallout 4: Game of the Year Edition Fallout 76 Far Cry 3: Classic Edition Far Cry 4 Far Cry 5 – Season Pass Far Cry New Dawn – Ultimate Edition Far Cry® 6 – Game of the Year Edition FAR CRY®6 Standard Edition Final Fantasy VII Remake FINAL FANTASY VII REMAKE & REBIRTH Twin Pack FINAL FANTASY VII REMAKE INTERGRADE Fist of the North Star: Lost Paradise For Honor – Year 8 Standard Edition Forspoken Digital Deluxe Edition Fort Solis FREEDOM WARS Remastered Funko Fusion – Mega Man Pack Bundle Gangs of Sherwood Garden Life: A Cozy Simulator Genesis Alpha One Deluxe Edition Get Even Ghost of a Tale Ghostrunner Ghostrunner 2 Ghostrunner 2 Brutal Edition Ghostrunner PS5 Ghosts ‘n Goblins Resurrection God of War III Remastered Godfall Ultimate Edition Gord – Deluxe Edition Gotham Knights Grand Theft Auto V: Premium Edition Gravel – Special Edition GRID Legends (PS4) GRID Legends (PS5) Gris GTA Online + Single Player Unlock PS5 GTA Trilogy PS4 & PS5 Digital Bundle Handball 17 Hatsune Miku: Project DIVA Future Tone – Season Pass Hellsweeper VR – Deluxe Edition HITMAN World of Assassination – Upgrade Pack Homefront: The Revolution – Expansion Pass Hotel Renovator – Five Star Edition Hotel: A Resort Simulator House Builder House Builder Overtime Humankind Heritage Deluxe Edition Hunt: Showdown 1896 – Starter Edition Hunt: Showdown 1986 – Premium Edition Hunting Simulator 2 Elite Edition I Am Setsuna Ice Age: Scrat’s Nutty Adventure Immortals of Aveum – Deluxe Edition Indiana Jones and the Great Circle inFAMOUS First Light Infinity Strash: DRAGON QUEST The Adventure of Dai Infinity Strash: DRAGON QUEST The Adventure of Dai – Digital Deluxe Upgrade Injustice: Gods Among Us – Ultimate Edition Inscryption Instant Sports Winter Games Insurgency: Sandstorm Insurgency: Sandstorm – Gold Edition Insurgency: Sandstorm – Year 1 Pass It Takes Two PS4™ & PS5™ Jeopardy! Jumanji: Wild Adventures Just Cause 3: XXL Edition Just Cause 4: Reloaded KCD 2 Main Game Kill The Bad Guy Kingdom Come: Deliverance – DLC Collection Kingdom Hearts HD 1.5 + 2.5 Remix KINGDOM HEARTS Melody of Memory Kingdoms of Amalur: Re-Reckoning Knack 2 KOF XV Ultimate Edition L.A. Noire Legendary Fishing LEGO 2K Drive LEGO DC Super-Villains LEGO DC Super-Villains – Season Pass LEGO Marvel Super Heroes LEGO Marvel Super Heroes 2 LEGO Marvel Super Heroes 2 – Season Pass LEGO Star Wars: The Force Awakens Deluxe Edition LEGO Star Wars: The Skywalker Saga – Galactic Edition LEGO The Incredibles LEGO® 2K Drive Standard Cross-Gen Edition Lethis – Path of Progress Life is Strange: Double Exposure Life is Strange: Double Exposure – Ultimate Edition Like a Dragon: Infinite Wealth PS4&PS5 Like a Dragon: Infinite Wealth – Ultimate Edition Like a Dragon: Pirate Yakuza in Hawaii Deluxe Edition Lords of Exile Lost Eidolons – Standard Mafia Trilogy Bundle Mafia: Definitive Edition Mahjong Marvel’s Midnight Suns for PS4™ Marvel’s Spider-Man – The City That Never Sleeps Mass Effect™ Legendary Edition Medieval Dynasty Mega Man Legacy Collection Mega Man Legacy Collection 2 Mega Man X Legacy Collection Mega Man X Legacy Collection 2 Mega Man Zero/ZX Legacy Collection Megaman Battle Network Legacy Collection (Main Game Digital Bundle) Merchant of the Skies Metal Wolf Chaos XD Metro 2033 Redux Metro Awakening Metro Awakening + Arizona Sunshine® 2 Metro Exodus: Gold Edition Metro Saga Bundle Metro: Last Light Redux Middle-earth: Shadow of Mordor – Game of the Year Edition Middle-earth: Shadow of War – Definitive Edition Mindcop Minit Miraculous: Rise of the Sphinx Momonga Pinball Adventures Monopoly 2024 Monster Energy Supercross: The Official Video Game 2 Monster Energy Supercross: The Official Video Game 2 – Special Edition Monster High™ Skulltimate Secrets™ Monster Jam Steel Titans Monster of the Deep: Final Fantasy XV Monster Truck Championship Rebel Hunter Edition Mortal Kombat 1 Mortal Kombat 1: Definitive Edition Upgrade Mortal Kombat 11 Mortal Kombat 11 Ultimate Add-On Bundle MotoGP 17 Motorcycle Club Moving Out Moving Out + Moving Out 2 Bundle MudRunner – American Wilds Edition MXGP 2020 – The Official Motocross Videogame My Fantastic Ranch: Unicorn & Dragons My Friend Peppa Pig My Hero One’s Justice MY LITTLE PONY: A Maretime Bay Adventure Naruto Shippuden: Ultimate Ninja Storm 2 Naruto Shippuden: Ultimate Ninja Storm 3 Full Burst Naruto to Boruto: Shinobi Striker – Deluxe Edition Naruto: Ultimate Ninja Storm NBK Dungeon Master Need for Speed Unbound (PS5) Need for Speed™ Hot Pursuit Remastered Neon Abyss NeuroVoider New Tales from the Borderlands NFS Unbound – Complete Edition Ni no Kuni II: Revenant Kingdom Ni no Kuni II: Revenant Kingdom – Season Pass Nick Jr. Party Adventure Nickelodeon Kart Racers 3: Slime Speedway (BASE GAME) Nioh No Man’s Sky PS4 & PS5 Nobody Wants to Die Nocturnal Nova Strike OCTOPATH TRAVELER + OCTOPATH TRAVELER II Bundle Oh My Godheads OlliOlli World One Piece: Burning Blood One Piece: Grand Cruise One Piece: Pirate Warriors 4 – Deluxe Edition One Piece: World Seeker – Deluxe Edition Oninaki Out Of Space: Couch Edition OUTRIDERS PS4 & PS5 Overcooked! Overcooked! All You Can Eat Overpass 2 OVERPASS Deluxe Edition PAW Patrol Mighty Pups Save Adventure Bay Paw Patrol: Grand Prix Persona 3: Dancing in Moonlight Persona 4 Arena Ultimax Persona 5: Dancing in Starlight PGA TOUR 2K25 PGA TOUR 2K25 Legend Edition Phoenix Wright: Ace Attorney Trilogy Pillars of Eternity: Complete Edition PJ Masks Power Heroes: Mighty Alliance Plants vs. Zombies: Garden Warfare 2 Portal Knights: Legendary Edition Portkey Games Hogwarts Legacy Powerwash Simulator Pure Farming 2018 – Deluxe Edition Puyo Puyo Champions Puyo Puyo Tetris Puyo Puyo Tetris 2 PS4 & PS5 Rabbids Invasion – Gold Edition Rabbids Party of Legends RAD RAGE 2: Deluxe Edition Railway Empire 2 RAINBOW HIGH™: RUNWAY RUSH Rainbow Six Extraction Deluxe Edition Rainbow Six Extraction Standard Edition Ratchet & Clank: Rift Apart Rayman Legends Ready or Not Ready or Not: Digital Deluxe Edition Ready or Not: Mission Pass Recompile Red Dead Online Red Dead Redemption 2 Red Dead Redemption 2: Story Mode Remnant: From the Ashes – Complete Edition Returnal Digital Deluxe Edition Ride 3 RiMS Racing Risen Risen 3: Titan Lords – Enhanced Edition Risk of Rain Risk of Rain 2 RoadCraft RoboCop: Rogue City Rogue Spirit Romancing SaGa -Minstrel Song- Remastered PS4 & PS5 Ryan’s Rescue Squad SaGa Emerald Beyond PS5&PS4 Saints Row SCARLET NEXUS Ultimate Edition Sea of Thieves: 2025 Premium Edition SERIAL CLEANERS Session – Year One Complete Edition Shape of the World Shattered: Tale of the Forgotten King Shin Megami Tensei III Nocturne HD Remaster Ship of Fools Sid Meier’s Civilization® VII (Cross Gen Edition) Skabma – Snowfall Skull & Bones Skyrim Anniversary Edition + Fallout 4 G.O.T.Y Bundle Sniper Elite V2 Remastered Sniper Elite: Resistance Deluxe Edition SnowRunner – 2 Year Anniversary Edition Solitaire Sonic Forces Soulcalibur VI – Deluxe Edition Souldiers South of the Circle South Park: The Fractured but Whole South Park: The Fractured but Whole – Season Pass Spacebase Startopia – PS4 & PS5 Spirit Mancer Spirit of the Island Splasher SpongeBob SquarePants: Battle for Bikini Bottom – Rehydrated SpongeBob SquarePants: The Cosmic Shake STAR OCEAN THE DIVINE FORCE Star Ocean: First Departure R Star Ocean: Integrity and Faithlessness – Digital Edition Star Trek Prodigy: Supernova Star Wars Battlefront II Star Wars Outlaws – Ultimate Edition STAR WARS™: Squadrons Stellar Blade Complete Edition Steredenn: Binary Stars Stray Blade Strider Strikers Edge Subnautica Sudden Strike 4: Complete Collection Suicide Squad: Kill the Justice League Super Bomberman R Sword Art Online: Lost Song SYNDUALITY:Echo of Ada Tales of Graces f Remastered Tales of Kenzera™: ZAU TEKKEN 8 Tennis World Tour 2 Ace Edition Terra Memoria Test Drive Unlimited Solar Crown – Gold Edition Test Drive Unlimited Solar Crown – Silver Street Edition TH34R – Standard Edition Bundle That Time I Got Reincarnated as a Slime ISEKAI Chronicles That’s My Family: Family Fun Night The 7th Guest VR The Arkane Collection PS4 The Crew: Motorfest Gold Edition Year 2 The Dark Pictures Anthology: House of Ashes The DioField Chronicle PS4 & PS5 The Disney Afternoon Collection The Dungeon of Naheulbeuk: The Amulet of Chaos The Elder Scrolls IV: Oblivion Remastered The Evil Within Season Pass The Inquisitor The Invincible The Jak and Daxter Collection The King of Fighters XIV THE KING OF FIGHTERS XV The Land Beneath Us The Last Campfire The Last Door: Complete Edition The Last Remnant Remastered The LEGO Movie Videogame The Order: 1886 The Outlast Trials The Patrick Star Game The Quarry The Seven Deadly Sins: Knights of Britannia The Surge 2 – Premium Edition The Surge: Augmented Edition The Survivalists – Deluxe Edition The Talos Principle 2 The Witcher 3: Wild Hunt The Wizards – Dark Times: Brotherhood THEATRHYTHM FINAL BAR LINE THEATRHYTHM FINAL BAR LINE Digital Deluxe Upgrade THEATRHYTHM FINAL BAR LINE Premium Digital Deluxe Edition TIEBREAK: Official game of the ATP and WTA TimeSplitters TimeSplitters 2 Tiny Tina’s Wonderlands Tiny Tina’s Wonderlands: Chaotic Great Edition TMNT: Mutants Unleashed Tokyo Ghoul: re Call to Exist Tom Clancy’s Ghost Recon Breakpoint: Deluxe Edition 2021 Tom Clancy’s Ghost Recon Breakpoint: Gold Edition Tom Clancy’s Ghost Recon: Wildlands – Season Pass TopSpin 2K25 – Cross-Gen Edition TopSpin 2K25 – Grand Slam Edition Tour de France 2025 – Deluxe Edition Train Life – A Railway Simulator PS4 Train Life – A Railway Simulator PS5 TRANSFORMERS: EARTHSPARK – Expedition Trepang2 Trials of Mana Tribes of Midgard Digital Deluxe Trine 5 Trivial Pursuit Live! 2 Tropico 5 Tropico 5 – Complete Collection Upgrade Pack Tropico 6 – Next Gen Edition TT Isle Of Man 3 – Racing Fan Edition TT Isle of Man: Ride on the Edge Type:Rider UFC® 5 PS5 Umbrella Corps Umbrella Corps – Deluxe Edition Underworld Ascendant Unheard – Voices of Crime Unknown 9 Uno – Standard Edition Cross-buy Unturned Valkyria Chronicles Remastered Vanguard – Cross-Gen Edition Vanguard – PS5 Cross-Gen Edition Vernal Edge Voice of Cards Trilogy + DLC set Voice of Cards: The Beast of Burden + DLC set Voice of Cards: The Isle Dragon Roars + DLC set V-Rally 4 – Ultimate Edition War Hospital Warhammer 40,000: Inquisitor – Martyr: Complete Collection Warhammer 40,000: Space Marine 2 Warhammer Ultimate Pack: Hack and Slash Warhammer: Chaosbane Warhammer: Chaosbane Slayer Edition Welcome to ParadiZe – Zombot Edition Werewolf: The Apocalypse – Earthblood Werewolf: The Apocalypse – Earthblood Champion of Gaia Wild Hearts Karakuri Edition Bundle Wildshade: Unicorn Champions Wolfenstein: Resistance Bundle Wolfenstein: Youngblood – Deluxe Edition Worms Rumble PS4 & PS5 WRC 2023 (PS5) WRC 9 FIA World Rally Championship PS4 WRC 9 FIA World Rally Championship PS5 WRC Generations – The FIA WRC Official Game Yakuza Complete Collection Yakuza: Like a Dragon Legendary Hero Edition Yakuza: Like a Dragon Legendary Hero Edition PS4 & PS5 Yakuza: Like a Dragon PS4 & PS5 Zombie Army Trilogy Zone of the Enders: The 2nd Runner – Mars *Ready Set Play promotion is live on PlayStation Store from Wednesday, August 27 at 00:00 AM PDT/BST/JST and finishes Wednesday September 10 at 11:59 PM PDT/BST/JST.
    Like
    Love
    Wow
    Sad
    Angry
    1K
    · 2 Comments ·0 Shares
  • Romancing SaGa 2 Gets Major Price Cut For PS5 And Switch

    Romancing SaGa 2: Revenge of the Seven for PS5See See at Best Buy Romancing SaGa 2: Revenge of the Seven for Nintendo SwitchSee See at Best Buy Romancing SaGa 2: Revenge of the Seven is on sale for only for Nintendo Switch and PS5 this week. Though not technically part of Amazon's Labor Day Sale, the retailer is matching deals offered in competitor promotions, and the fully rebuilt remake of this Square Enix classic is one of them.Nintendo Switch 2 owners can buy the Switch physical edition for and purchase the official upgrade from the eShop for The Switch 2 edition is on the eShop, so you're still saving 10 bucks overall with the physical edition.Continue Reading at GameSpot
    #romancing #saga #gets #major #price
    Romancing SaGa 2 Gets Major Price Cut For PS5 And Switch
    Romancing SaGa 2: Revenge of the Seven for PS5See See at Best Buy Romancing SaGa 2: Revenge of the Seven for Nintendo SwitchSee See at Best Buy Romancing SaGa 2: Revenge of the Seven is on sale for only for Nintendo Switch and PS5 this week. Though not technically part of Amazon's Labor Day Sale, the retailer is matching deals offered in competitor promotions, and the fully rebuilt remake of this Square Enix classic is one of them.Nintendo Switch 2 owners can buy the Switch physical edition for and purchase the official upgrade from the eShop for The Switch 2 edition is on the eShop, so you're still saving 10 bucks overall with the physical edition.Continue Reading at GameSpot #romancing #saga #gets #major #price
    Romancing SaGa 2 Gets Major Price Cut For PS5 And Switch
    www.gamespot.com
    Romancing SaGa 2: Revenge of the Seven for PS5 $30 (was $50) See at Amazon See at Best Buy Romancing SaGa 2: Revenge of the Seven for Nintendo Switch $30 (was $50) See at Amazon See at Best Buy Romancing SaGa 2: Revenge of the Seven is on sale for only $30 for Nintendo Switch and PS5 at Amazon this week. Though not technically part of Amazon's Labor Day Sale, the retailer is matching deals offered in competitor promotions, and the fully rebuilt remake of this Square Enix classic is one of them.Nintendo Switch 2 owners can buy the Switch physical edition for $30 and purchase the official upgrade from the eShop for $10. The Switch 2 edition is $50 on the eShop, so you're still saving 10 bucks overall with the physical edition.Continue Reading at GameSpot
    Like
    Love
    Wow
    Sad
    Angry
    952
    · 2 Comments ·0 Shares
  • Developer Rec Room lays off 'about half' its staff

    Diego Argüello, Contributing Editor, News, GameDeveloper.comAugust 26, 20253 Min ReadImage via Rec RoomDeveloper Rec Room, the team behind the namesake user-generated contentdriven social game, has laid off "about half" its staff.Announced yesterday via the official site, CEO and co-founder Nick Fajt wrote that both he and CCO and co-founder Cameron Brown made the decision, which they called a "business necessity based on the financial trajectory of the company" that doesn't reflect on the individuals affected."This is not a reflection on the talent or dedication of those departing—we wish we could keep every one of them," reads the announcement. "I’m gonna say that again, to make it clear this isn’t just 'one of those things you say in a layoff message'. We TRULY wish we could keep every one of these people on the team. But we can't. This is a reflection of the tough reality we face as a business and the change needed to give Rec Room a chance to thrive in the years ahead."According to the post, the laid off workers will continue to be paid for the next three months, receive health benefits for the next six months, and have the option to keep their laptop or desktop computer. Rec Room didn't specify how many people were affected.'The writing on the wall became very clear'Back in December 2021, Rec Room raised million for its social platform, bringing the company's lifetime raised funds to around million. According to Brown, the team invested "heavily in creation tools across PC, VR, consoles, and mobile," but the reality "has been harsh." The CEO claims the mobile and console versions never got to the point where "those devices were good for building stuff." Some of the efforts to bridge the gap, including the Maker AI tool, frustrated the studio's "more impactful creators." Related:At the same time, the lower-powered devices still fostered "millions of pieces of content," which reportedly put a strain on the team that had to come up with procedures to review it all. "Making all this run across every device was a massive technical challenge and burden. While our most skilled creators optimized their content cleverly, most creators didn’t—couldn’t, really, because we didn’t provide them with the necessary tooling."Last month, Fajt announced that Rec Room hit a "record-breaking month" for UGC sales thanks to the creations from players, with creator token earnings from room and Watch store sales increasing 47 percent year-over-year."We deliberately started with a small group of creators as the Avatar Studio tool is still in the early stages," Fajt wrote at the time. "All of the early joiners helped us iron out the workflow and onboarding, providing feedback on how to improve our systems and processes. With creators already finding success, we’re ready to expand."Related:Today's announcement continues by saying that supporting the aforementioned scope stretched the team thin, and began to "dig a financial hole that was getting larger every day." The CEO says the studio has been stuck in an "uncomfortable middle ground" during the past few years, wondering whether to keep pushing the internal UGC vision while potentially increasing the frustration of players and the team, or scale back the vision by cutting the team in half."Both paths were painful," Brown wrote. "But ultimately we got to a point where it was clear that staying the course meant low growth, a high burn rate, and no clear path forward. In a word: Unsustainable. The writing on the wall became very clear."Looking forward, Brown says the team will focus on "empowering our very best creators" and "ensuring Rec Room is a great experience for our players.""For those leaving—you will always be part of the Rec Room story," Brown wrote as a closing note about the layoffs. "We thank you for everything, and wish you the best for your next chapter. For those staying—we know this sucks. We know this hurts. Thank you for pushing forward with us—we have hard work ahead, but with a new focus we believe strongly in the future we can build together."Related:Game Developer has reached out to Rec Room for clarification on the number of workers affected. about:Top StoriesLayoffs & Studio ClosuresAbout the AuthorDiego ArgüelloContributing Editor, News, GameDeveloper.comDiego Nicolás Argüello is a freelance journalist and critic from Argentina. Video games helped him to learn English, so now he covers them for places like The New York Times, NPR, Rolling Stone, and more. He also runs Into the Spine, a site dedicated to fostering and supporting new writers, and co-hosted Turnabout Breakdown, a podcast about the Ace Attorney series. He’s most likely playing a rhythm game as you read this.See more from Diego ArgüelloDaily news, dev blogs, and stories from Game Developer straight to your inboxStay UpdatedYou May Also Like
    #developer #rec #room #lays #off
    Developer Rec Room lays off 'about half' its staff
    Diego Argüello, Contributing Editor, News, GameDeveloper.comAugust 26, 20253 Min ReadImage via Rec RoomDeveloper Rec Room, the team behind the namesake user-generated contentdriven social game, has laid off "about half" its staff.Announced yesterday via the official site, CEO and co-founder Nick Fajt wrote that both he and CCO and co-founder Cameron Brown made the decision, which they called a "business necessity based on the financial trajectory of the company" that doesn't reflect on the individuals affected."This is not a reflection on the talent or dedication of those departing—we wish we could keep every one of them," reads the announcement. "I’m gonna say that again, to make it clear this isn’t just 'one of those things you say in a layoff message'. We TRULY wish we could keep every one of these people on the team. But we can't. This is a reflection of the tough reality we face as a business and the change needed to give Rec Room a chance to thrive in the years ahead."According to the post, the laid off workers will continue to be paid for the next three months, receive health benefits for the next six months, and have the option to keep their laptop or desktop computer. Rec Room didn't specify how many people were affected.'The writing on the wall became very clear'Back in December 2021, Rec Room raised million for its social platform, bringing the company's lifetime raised funds to around million. According to Brown, the team invested "heavily in creation tools across PC, VR, consoles, and mobile," but the reality "has been harsh." The CEO claims the mobile and console versions never got to the point where "those devices were good for building stuff." Some of the efforts to bridge the gap, including the Maker AI tool, frustrated the studio's "more impactful creators." Related:At the same time, the lower-powered devices still fostered "millions of pieces of content," which reportedly put a strain on the team that had to come up with procedures to review it all. "Making all this run across every device was a massive technical challenge and burden. While our most skilled creators optimized their content cleverly, most creators didn’t—couldn’t, really, because we didn’t provide them with the necessary tooling."Last month, Fajt announced that Rec Room hit a "record-breaking month" for UGC sales thanks to the creations from players, with creator token earnings from room and Watch store sales increasing 47 percent year-over-year."We deliberately started with a small group of creators as the Avatar Studio tool is still in the early stages," Fajt wrote at the time. "All of the early joiners helped us iron out the workflow and onboarding, providing feedback on how to improve our systems and processes. With creators already finding success, we’re ready to expand."Related:Today's announcement continues by saying that supporting the aforementioned scope stretched the team thin, and began to "dig a financial hole that was getting larger every day." The CEO says the studio has been stuck in an "uncomfortable middle ground" during the past few years, wondering whether to keep pushing the internal UGC vision while potentially increasing the frustration of players and the team, or scale back the vision by cutting the team in half."Both paths were painful," Brown wrote. "But ultimately we got to a point where it was clear that staying the course meant low growth, a high burn rate, and no clear path forward. In a word: Unsustainable. The writing on the wall became very clear."Looking forward, Brown says the team will focus on "empowering our very best creators" and "ensuring Rec Room is a great experience for our players.""For those leaving—you will always be part of the Rec Room story," Brown wrote as a closing note about the layoffs. "We thank you for everything, and wish you the best for your next chapter. For those staying—we know this sucks. We know this hurts. Thank you for pushing forward with us—we have hard work ahead, but with a new focus we believe strongly in the future we can build together."Related:Game Developer has reached out to Rec Room for clarification on the number of workers affected. about:Top StoriesLayoffs & Studio ClosuresAbout the AuthorDiego ArgüelloContributing Editor, News, GameDeveloper.comDiego Nicolás Argüello is a freelance journalist and critic from Argentina. Video games helped him to learn English, so now he covers them for places like The New York Times, NPR, Rolling Stone, and more. He also runs Into the Spine, a site dedicated to fostering and supporting new writers, and co-hosted Turnabout Breakdown, a podcast about the Ace Attorney series. He’s most likely playing a rhythm game as you read this.See more from Diego ArgüelloDaily news, dev blogs, and stories from Game Developer straight to your inboxStay UpdatedYou May Also Like #developer #rec #room #lays #off
    Developer Rec Room lays off 'about half' its staff
    www.gamedeveloper.com
    Diego Argüello, Contributing Editor, News, GameDeveloper.comAugust 26, 20253 Min ReadImage via Rec RoomDeveloper Rec Room, the team behind the namesake user-generated content (UGC) driven social game, has laid off "about half" its staff.Announced yesterday via the official site, CEO and co-founder Nick Fajt wrote that both he and CCO and co-founder Cameron Brown made the decision, which they called a "business necessity based on the financial trajectory of the company" that doesn't reflect on the individuals affected."This is not a reflection on the talent or dedication of those departing—we wish we could keep every one of them," reads the announcement. "I’m gonna say that again, to make it clear this isn’t just 'one of those things you say in a layoff message'. We TRULY wish we could keep every one of these people on the team. But we can't. This is a reflection of the tough reality we face as a business and the change needed to give Rec Room a chance to thrive in the years ahead."According to the post, the laid off workers will continue to be paid for the next three months, receive health benefits for the next six months, and have the option to keep their laptop or desktop computer. Rec Room didn't specify how many people were affected.'The writing on the wall became very clear'Back in December 2021, Rec Room raised $145 million for its social platform, bringing the company's lifetime raised funds to around $294 million. According to Brown, the team invested "heavily in creation tools across PC, VR, consoles, and mobile," but the reality "has been harsh." The CEO claims the mobile and console versions never got to the point where "those devices were good for building stuff." Some of the efforts to bridge the gap, including the Maker AI tool, frustrated the studio's "more impactful creators." Related:At the same time, the lower-powered devices still fostered "millions of pieces of content," which reportedly put a strain on the team that had to come up with procedures to review it all. "Making all this run across every device was a massive technical challenge and burden. While our most skilled creators optimized their content cleverly, most creators didn’t—couldn’t, really, because we didn’t provide them with the necessary tooling."Last month, Fajt announced that Rec Room hit a "record-breaking month" for UGC sales thanks to the creations from players, with creator token earnings from room and Watch store sales increasing 47 percent year-over-year."We deliberately started with a small group of creators as the Avatar Studio tool is still in the early stages," Fajt wrote at the time. "All of the early joiners helped us iron out the workflow and onboarding, providing feedback on how to improve our systems and processes. With creators already finding success, we’re ready to expand."Related:Today's announcement continues by saying that supporting the aforementioned scope stretched the team thin, and began to "dig a financial hole that was getting larger every day." The CEO says the studio has been stuck in an "uncomfortable middle ground" during the past few years, wondering whether to keep pushing the internal UGC vision while potentially increasing the frustration of players and the team, or scale back the vision by cutting the team in half."Both paths were painful," Brown wrote. "But ultimately we got to a point where it was clear that staying the course meant low growth, a high burn rate, and no clear path forward. In a word: Unsustainable. The writing on the wall became very clear."Looking forward, Brown says the team will focus on "empowering our very best creators" and "ensuring Rec Room is a great experience for our players.""For those leaving—you will always be part of the Rec Room story," Brown wrote as a closing note about the layoffs. "We thank you for everything, and wish you the best for your next chapter. For those staying—we know this sucks. We know this hurts. Thank you for pushing forward with us—we have hard work ahead, but with a new focus we believe strongly in the future we can build together."Related:Game Developer has reached out to Rec Room for clarification on the number of workers affected.Read more about:Top StoriesLayoffs & Studio ClosuresAbout the AuthorDiego ArgüelloContributing Editor, News, GameDeveloper.comDiego Nicolás Argüello is a freelance journalist and critic from Argentina. Video games helped him to learn English, so now he covers them for places like The New York Times, NPR, Rolling Stone, and more. He also runs Into the Spine, a site dedicated to fostering and supporting new writers, and co-hosted Turnabout Breakdown, a podcast about the Ace Attorney series. He’s most likely playing a rhythm game as you read this.See more from Diego ArgüelloDaily news, dev blogs, and stories from Game Developer straight to your inboxStay UpdatedYou May Also Like
    Like
    Love
    Wow
    Sad
    Angry
    636
    · 2 Comments ·0 Shares
  • Fur Grooming Techniques For Realistic Stitch In Blender

    IntroductionHi everyone! My name is Oleh Yakushev, and I'm a 3D Artist from Ukraine. My journey into 3D began just three years ago, when I was working as a mobile phone salesperson at a shopping mall. In 2022, during one slow day at work, I noticed a colleague learning Python. We started talking about life goals. I told him I wanted to switch careers, to do something creative, but programming wasn't really my thing.He asked me a simple question: "Well, what do you actually enjoy doing?"I said, "Video games. I love video games. But I don't have time to learn how to make them, I've got a job, a family, and a kid."Then he hit me with something that really shifted my whole perspective."Oleh, do you play games on your PlayStation?"I said, "Of course."He replied, "Then why not take the time you spend playing and use it to learn how to make games?"That moment flipped a switch in my mind. I realized that I did have time, it was just a matter of how I used it. If I really wanted to learn, I could find a way. At the time, I didn't even own a computer. But where there's a will, there's a way: I borrowed my sister's laptop for a month and started following beginner 3D tutorials on YouTube. Every night after work, once my family went to sleep, I'd sit in the kitchen and study. I stayed up until 2 or 3 AM, learning Blender basics. Then I'd sleep for a few hours before waking up at 6 AM to go back to work. That's how I spent my first few months in 3D, studying every single night.3D completely took over my life. During lunch breaks, I watched 3D videos, on the bus, I scrolled through 3D TikToks, at home, I took 3D courses, and the word "3D" just became a constant in my vocabulary.After a few months of learning the basics, I started building my portfolio, which looks pretty funny to me now. But at the time, it was a real sign of how committed I was. Eventually, someone reached out to me through Behance, offering my first freelance opportunity. And thatэs how my journey began, from mall clerk to 3D artist. It's been a tough road, full of burnout, doubts, and late nights... but also full of curiosity, growth, and hope. And I wouldn't trade it for anything.The Stitch ProjectI've loved Stitch since I was a kid. I used to watch the cartoons, play the video games, and he always felt like such a warm, funny, chill, and at the same time, strong character. So once I reached a certain level in 3D, I decided to recreate Stitch.Back then, my skills only allowed me to make him in a stylized cartoonish style, no fur, no complex detailing, no advanced texturing, I just didn't have the experience. Surprisingly, the result turned out pretty decent. Even now, I sometimes get comments that my old Stitch still looks quite cute. Though honestly, I wouldn't say that myself anymore. Two years have passed since I made that first Stitch, it was back in 2023. And in 2025, I decided it was time to challenge myself.At that point, I had just completed an intense grooming course. Grooming always intimidated me, it felt really complex. I avoided it on commercial projects, made a few failed attempts for my portfolio, and overall tried to steer clear of any tasks where grooming was required. But eventually, I found the strength to face it.I pushed myself to learn how to make great fur, and I did. I finally understood how the grooming system works, grasped the logic, the tools, and the workflow. And after finishing the course, I wanted to lock in all that knowledge by creating a full personal project from scratch.So my goal was to make a character from the ground up, where the final stage would be grooming. And without thinking too long, I chose Stitch.First, because I truly love the character. Second, I wanted to clearly see my own progress over the past two years. Third, I needed to put my new skills to the test and find out whether my training had really paid off.ModelingI had a few ideas for how to approach the base mesh for this project. First, to model everything completely from scratch, starting with a sphere. Second, to reuse my old Stitch model and upgrade it.But then an idea struck me: why not test how well AI could handle a base mesh? I gathered some references and tried generating a base mesh using AI, uploading Stitch visuals as a guide. As you can see from the screenshot, the result was far from usable. So I basically ended up doing everything from scratch anyway.So, I went back to basics: digging through ArtStation and Pinterest, collecting references. Since over the last two years, I had not only learned grooming but also completely changed my overall approach to character creation, it was important for me to make a more detailed model, even if much of it would be hidden under fur.The first Stitch was sculpted in Blender, with all the limitations that come with sculpting in it. But since then, I've leveled up significantly and switched to more advanced tools. So this second version of Stitch was born in ZBrush. By the time I started working on this Stitch, ZBrush had already become my second main workspace. I've used it to deliver tons of commercial projects, I work in it almost daily, and most of my portfolio was created using this tool. I found some great reference images showing Stitch's body structure. Among them were official movie references and a stunning high-poly model created by Juan Hernández, a version of Stitch without fur. That model became my primary reference for sculpting.Truth is, Stitch's base form is quite simple, so blocking out the shape didn't take too long. When blocking, I use Blender in combination with ZBrush:I work with primary forms in ZBrushThen check proportions in BlenderFix mistakes, tweak volumes, and refine the silhouetteSince Stitch's shape isn't overly complex, I broke him down into three main sculpting parts:The body: arms, legs, head, and earsThe nose, eyes, and mouth cavityWhile planning the sculpt, I already knew I'd be rigging Stitch, both body and facial rig. So I started sculpting with his mouth open.While studying various references, I noticed something interesting. Stitch from promotional posters, Stitch from the movie, and Stitch as recreated by different artists on ArtStation all look very different from one another. What surprised me the most was how different the promo version of Stitch is compared to the one in the actual movie. They are essentially two separate models:Different proportionsDifferent shapesDifferent texturesEven different fur and overall designThis presented a creative challenge, I had to develop my own take on Stitch's design. Sometimes I liked the way the teeth were done in one version, in another, the eye placement, in another, the fur shape, or the claw design on hands and feet.At first, considering that Stitch is completely covered in fur from head to toe, sculpting his underlying anatomy seemed pointless. I kept asking myself: "Why sculpt muscles and skin detail if everything will be hidden under fur anyway?"But eventually, I found a few solid answers for myself. First, having a defined muscle structure actually makes the fur grooming process easier. That's because fur often follows the flow of muscle lines, so having those muscles helps guide fur direction more accurately across the character's body.Second, it's great anatomy practice, and practice is never a waste. So, I found a solid anatomical reference of Stitch with clearly visible muscle groups and tried to recreate that structure as closely as possible in my own sculpt.In the end, I had to develop a full visual concept by combining elements from multiple versions of Stitch. Through careful reference work and constantly switching between Blender and ZBrush, I gradually, but intentionally, built up the body and overall look of our favorite fluffy alien.Topology & UVsThroughout the sculpting process, I spent quite a bit of time thinking about topology. I was looking for the most balanced solution between quality and production time. Normally, I do manual retopology for my characters, but this time, I knew it would take too much time, and honestly, I didn't have that luxury.So I decided to generate the topology using ZBrush's tools. I split the model into separate parts using Polygroups, assigning individual groups for the ears, the head, the torso, the arms, the legs, and each of Stitch's fingers.With the Polygroups in place, I used ZRemesher with Keep Groups enabled and smoothing on group borders. This gave me a clean and optimized mesh that was perfect for UV unwrapping.Of course, this kind of auto-retopology isn't a full substitute for manual work, but it saved me a huge amount of time, and the quality was still high enough for what I needed. However, there was one tricky issue. Although Stitch looks symmetrical at first glance, his ears are actually asymmetrical. The right ear has a scar on the top, while the left has a scar on the bottomBecause of that, I couldn't just mirror one side in ZBrush without losing those unique features. Here's what I ended up doing: I created a symmetrical model with the right ear, then another symmetrical model with the left ear. I brought both into Blender, detached the left ear from one model, and attached it to the body of the other one. This way, I got a clean, symmetrical base mesh with asymmetrical ears, preserving both topology and detail. And thanks to the clean polygroup-based layout, I was able to unwrap the UVs with nice, even seams and clean islands.When it came to UV mapping, I divided Stitch into two UDIM tiles:The first UDIM includes the head with ears, torso, arms, and legs.The second UDIM contains all the additional parts: teeth, tongue, gums, claws, and noseSince the nose is one of the most important details, I allocated the largest space to it, which helped me to better capture its intricate details.As for the eyes, I used procedural eyes, so there was no need to assign UV space or create a separate UDIM for texturing them. To achieve this, I used the Tiny Eye add-on by tinynocky for Blender, which allows full control over procedural eyes and their parameters.This approach gave me high-quality eyes with customizable elements tailored exactly to my needs. As a result of all these steps, Stitch ended up with a symmetrical, optimized mesh, asymmetrical ears, and the body split across two UDIMs, one for the main body and one for the additional parts.TexturingWhen planning Stitch's texturing, I understood that the main body texture would be fairly simple, with much of the visual detail enhanced by the fur. However, there were some areas that required much more attention than the rest of the body. The textures for Stitch can be roughly divided into several main parts:The base body, which includes the primary color of his fur, along with additional shading like a lighter tone on the frontand a darker tone on the back and napeThe nose and ears, these zones, demanded separate focusAt the initial texturing/blocking stage, the ears looked too cartoony, which didn’t fit the style I wanted. So, I decided to push them towards a more realistic look. This involved removing bright colors, adding more variation in the roughness map, introducing variation in the base color, and making the ears visually more natural, layered, and textured on the surface. By combining smart materials and masks, I achieved the effect of "living" ears, slightly dirty and looking as natural as possible.The nose was a separate story. It occupies a significant part of the face and thus draws a lot of attention. While studying references, I noticed that the shape and texture of the nose vary a lot between different artists. Initially, I made it dog-like, with some wear and tear around the nostrils and base.For a long time, I thought this version was acceptable. But during test renders, I realized the nose needed improvement. So I reworked its texturing, aiming to make it more detailed. I divided the nose texture into four main layers:Base detail: Baked from the high-poly model. Over this, I applied a smart skin material that added characteristic bumps.Lighter layer: Applied via a mask using the AO channel. This darkened the crevices and brightened the bumps, creating a multi-layered effect.Organic detail: In animal references, I noticed slight redness in the nose area. I created another AO-masked layer with reddish capillaries visible through the bumps, adding depth and realism.Softness: To make the nose visually softer, like in references, I added a fill layer with only height enabled, used a paper texture as grayscale, and applied a blurred mask. This created subtle dents and wrinkles that softened the look.All textures were created in 4K resolution to achieve maximum detail. After finishing the main texturing stage, I add an Ambient Occlusion map on the final texture layer, activating only the Color channel, setting the blend mode to Multiply, and reducing opacity to about 35%. This adds volume and greatly improves the overall perception of the model.That covers the texturing of Stitch’s body. I also created a separate texture for the fur. This was simpler, I disabled unnecessary layers like ears and eyelids, and left only the base ones corresponding to the body’s color tones.During grooming, I also created textures for the fur's clamps and roughness. In Substance 3D Painter, I additionally painted masks for better fur detail.FurAnd finally, I moved on to the part that was most important to me, the very reason I started this project in the first place. Fur. This entire process was essentially a test of my fur grooming skills. After overcoming self-doubt, I trusted the process and relied on everything I had learned so far. Before diving into the grooming itself, I made sure to gather strong references. I searched for the highest quality and most inspiring examples I could find and analyzed them thoroughly. My goal was to clearly understand the direction of fur growth, its density and volume, the intensity of roughness, and the strength of clumping in different areas of Stitch's body.To create the fur, I used Blender and its Hair Particle System. The overall approach is similar to sculpting a high-detail model: work from broad strokes to finer details. So, the first step was blocking out the main flow and placement of the hair strands.At this point, I ran into a challenge: symmetry. Since the model was purposefully asymmetrical, the fur couldn't be mirrored cleanly. To solve this, I created a base fur blocking using Hair Guides with just two segments. After that, I split the fur into separate parts. I duplicated the main Particle System and created individual hair systems for each area where needed.In total, I broke Stitch's body into key sections: head, left ear, right ear, front torso, back torso, arms, hands, upper and lower legs, toes, and additional detailing layers. The final fur setup included 25 separate particle systems.To control fur growth, I used Weight Paint to fine-tune the influence on each body part individually. This separation gave me much more precision and allowed full control over every parameter of the fur on a per-section basis.The most challenging aspect of working with fur is staying patient and focused. Detail is absolutely critical because the overall picture is built entirely from tiny, subtle elements. Once the base layer was complete, I moved on to refining the fur based on my references.The most complex areas turned out to be the front of the torso and the face. When working on the torso, my goal was to create a smooth gradient, from thick, clumped fur on the chest to shorter, softer fur on the stomach.Step by step, I adjusted the transitions, directions, clumps, and volumes to achieve that look. Additionally, I used the fur itself to subtly enhance Stitch's silhouette, making his overall shape feel sharper, more expressive, and visually engaging.During fur development, I used texture maps to control the intensity of the Roughness and Clump parameters. This gave me a high degree of flexibility, textures drove these attributes across the entire model. In areas where stronger clumping or roughness was needed, I used brighter values; in zones requiring a softer look, darker values. This approach allowed for fine-tuned micro-level control of the fur shader and helped achieve a highly realistic appearance in renders.The face required special attention: the fur had to be neat, evenly distributed, and still visually appealing. The biggest challenge here was working around the eye area. Even with properly adjusted Weight Paint, interpolation sometimes caused strands to creep into the eyes.I spent a lot of time cleaning up this region to get an optimal result. I also had to revisit certain patches that looked bald, even though interpolation and weight painting were set correctly, because the fur didn't render properly there. These areas needed manual fixing.As part of the detailing stage, I also increased the number of segments in the Hair Guides.While the blocking phase only used two segments, I went up to three, and in some cases even five, for more complex regions. This gave me much more control over fur shape and flow.The tiniest details really matter, so I added extra fur layers with thinner, more chaotic strands extending slightly beyond the main silhouette. These micro-layers significantly improved the texture depth and boosted the overall realism.Aside from the grooming itself, I paid special attention to the fur material setup, as the shader plays a critical role in the final visual quality of the render. It's not enough to simply plug a color texture into a Principled BSDF node and call it done.I built a more complex shader, giving me precise control over various attributes. For example, I implemented subtle color variation across individual strands, along with darkening near the roots and a gradual brightening toward the tips. This helped add visual depth and made the fur look significantly more natural and lifelike.Working on the fur took up nearly half of the total time I spent on the entire model. And I'm genuinely happy with the result, this stage confirmed that the training I've gone through was solid and that I’m heading in the right direction with my artistic development.Rigging, Posing & SceneOnce I finished working on the fur, I rendered several 4K test shots from different angles to make sure every detail looked the way I intended. When I was fully satisfied with the results, it was time to move on to rigging.I divided the rigging process into three main parts:Body rig, for posing and positioning the characterFacial rig, for expressions and emotionsEar rig, for dynamic ear controlRigging isn't something I consider my strongest skill, but as a 3D generalist, I had to dive into many technical aspects of it. For the ears, I set up a relatively simple system with several bones connected using inverse kinematics. This gave me flexible and intuitive control during posing and allowed for the addition of dynamic movement in animation.For facial rigging, I used the FaceIt add-on, which generates a complete facial control system for mouth, eyes, and tongue. It sped up the process significantly and gave me more precision. For the body, I used the ActorCore Rig by NVIDIA, then converted it to Rigify, which gave me a familiar interface and flexible control over poses.Posing is one of my favorite stages, it's when the character really comes to life. As usual, it started with gathering references. Honestly, it was hard to pick the final poses, Stitch is so expressive and full of personality that I wanted to try hundreds of them. But I focused on those that best conveyed the spirit and mood of the character. Some poses I reworked to fit my style rather than copying directly. For example, in the pose where Stitch licks his nose, I added drool and a bit of "green slime" for comedic effect. To capture motion, I tilted his head back and made the ears fly upward, creating a vivid, emotional snapshot.Just like in sculpting or grooming, minor details make a big difference in posing. Examples include: a slight asymmetry in the facial expression, a raised corner of the mouth, one eye squinting a little more than the other, and ears set at slightly different angles.These are subtle things that might not be noticed immediately, but they’re the key to making the character feel alive and believable.For each pose, I created a separate scene and collection in Blender, including the character, specific lighting setup, and a simple background or environment. This made it easy to return to any scene later, to adjust lighting, reposition the character, or tweak the background.In one of the renders, which I used as the cover image, Stitch is holding a little frog.I want to clearly note that the 3D model of the frog is not mine, full credit goes to the original author of the asset.At first, I wanted to build a full environment around Stitch, to create a scene that would feel like a frame from a film. But after carefully evaluating my skills and priorities, I decided that a weak environment would only detract from the strength of the character. So I opted for a simple, neutral backdrop, designed to keep all the focus on Stitch himself.Rendering, Lighting & Post-ProcessingWhen the character is complete, posed expressively, and integrated into the scene, there's one final step: lighting. Lighting isn't just a technical element of the scene — it’s a full-fledged stage of the 3D pipeline. It doesn't just illuminate; it paints. Proper lighting can highlight the personality of the character, emphasize forms, and create atmosphere.For all my renders, I rely on the classic three-point lighting setup: Key Light, Fill Light, and Rim Light.While this setup is well-known, it remains highly effective. When done thoughtfully, with the right intensity, direction, and color temperature, it creates a strong light-shadow composition that brings the model to life. In addition to the three main lights, I also use an HDRI map, but with very low intensity, around 0.3, just enough to subtly enrich the ambient light without overpowering the scene.Once everything is set, it's time to hit Render and wait for the result. Due to hardware limitations, I wasn’t able to produce full animated shots with fur. Rendering a single 4K image with fur took over an hour, so I limited myself to a 360° turnaround and several static renders.I don't spend too much time on post-processing, just basic refinements in Photoshop. Slight enhancement of the composition, gentle shadow adjustments, color balance tweaks, and adding a logo. Everything is done subtly, nothing overprocessed. The goal is simply to support and enhance what’s already there.Final ThoughtsThis project has been an incredible experience. Although it was my second time creating Stitch, this time the process felt completely different at every stage. And honestly, it wasn't easy.But that was exactly the point: to challenge myself. To reimagine something familiar, to try things I'd never done before, and to walk the full journey from start to finish. The fur, the heart of this project, was especially meaningful to me. It’s what started it all. I poured a lot into this model: time, effort, emotion, and even doubts. But at the same time, I brought all my knowledge, skills, and experience into it.This work became a mirror of my progress from 2023 to 2025. I can clearly see how far I've come, and that gives me the motivation to keep going. Every hour of learning and practice paid off, the results speak for themselves. This model was created for my portfolio. I don't plan to use it commercially, unless, of course, a studio actually wants to license it for a new filmIt's been a long road: challenging, sometimes exhausting, but above all inspiring and exciting. I know there's still a lot to learn. Many things to study, improve, and polish to perfection. But I'm already on that path, and I'm not stopping.Oleh Yakushev, 3D Character ArtistInterview conducted by Gloria Levine
    #fur #grooming #techniques #realistic #stitch
    Fur Grooming Techniques For Realistic Stitch In Blender
    IntroductionHi everyone! My name is Oleh Yakushev, and I'm a 3D Artist from Ukraine. My journey into 3D began just three years ago, when I was working as a mobile phone salesperson at a shopping mall. In 2022, during one slow day at work, I noticed a colleague learning Python. We started talking about life goals. I told him I wanted to switch careers, to do something creative, but programming wasn't really my thing.He asked me a simple question: "Well, what do you actually enjoy doing?"I said, "Video games. I love video games. But I don't have time to learn how to make them, I've got a job, a family, and a kid."Then he hit me with something that really shifted my whole perspective."Oleh, do you play games on your PlayStation?"I said, "Of course."He replied, "Then why not take the time you spend playing and use it to learn how to make games?"That moment flipped a switch in my mind. I realized that I did have time, it was just a matter of how I used it. If I really wanted to learn, I could find a way. At the time, I didn't even own a computer. But where there's a will, there's a way: I borrowed my sister's laptop for a month and started following beginner 3D tutorials on YouTube. Every night after work, once my family went to sleep, I'd sit in the kitchen and study. I stayed up until 2 or 3 AM, learning Blender basics. Then I'd sleep for a few hours before waking up at 6 AM to go back to work. That's how I spent my first few months in 3D, studying every single night.3D completely took over my life. During lunch breaks, I watched 3D videos, on the bus, I scrolled through 3D TikToks, at home, I took 3D courses, and the word "3D" just became a constant in my vocabulary.After a few months of learning the basics, I started building my portfolio, which looks pretty funny to me now. But at the time, it was a real sign of how committed I was. Eventually, someone reached out to me through Behance, offering my first freelance opportunity. And thatэs how my journey began, from mall clerk to 3D artist. It's been a tough road, full of burnout, doubts, and late nights... but also full of curiosity, growth, and hope. And I wouldn't trade it for anything.The Stitch ProjectI've loved Stitch since I was a kid. I used to watch the cartoons, play the video games, and he always felt like such a warm, funny, chill, and at the same time, strong character. So once I reached a certain level in 3D, I decided to recreate Stitch.Back then, my skills only allowed me to make him in a stylized cartoonish style, no fur, no complex detailing, no advanced texturing, I just didn't have the experience. Surprisingly, the result turned out pretty decent. Even now, I sometimes get comments that my old Stitch still looks quite cute. Though honestly, I wouldn't say that myself anymore. Two years have passed since I made that first Stitch, it was back in 2023. And in 2025, I decided it was time to challenge myself.At that point, I had just completed an intense grooming course. Grooming always intimidated me, it felt really complex. I avoided it on commercial projects, made a few failed attempts for my portfolio, and overall tried to steer clear of any tasks where grooming was required. But eventually, I found the strength to face it.I pushed myself to learn how to make great fur, and I did. I finally understood how the grooming system works, grasped the logic, the tools, and the workflow. And after finishing the course, I wanted to lock in all that knowledge by creating a full personal project from scratch.So my goal was to make a character from the ground up, where the final stage would be grooming. And without thinking too long, I chose Stitch.First, because I truly love the character. Second, I wanted to clearly see my own progress over the past two years. Third, I needed to put my new skills to the test and find out whether my training had really paid off.ModelingI had a few ideas for how to approach the base mesh for this project. First, to model everything completely from scratch, starting with a sphere. Second, to reuse my old Stitch model and upgrade it.But then an idea struck me: why not test how well AI could handle a base mesh? I gathered some references and tried generating a base mesh using AI, uploading Stitch visuals as a guide. As you can see from the screenshot, the result was far from usable. So I basically ended up doing everything from scratch anyway.So, I went back to basics: digging through ArtStation and Pinterest, collecting references. Since over the last two years, I had not only learned grooming but also completely changed my overall approach to character creation, it was important for me to make a more detailed model, even if much of it would be hidden under fur.The first Stitch was sculpted in Blender, with all the limitations that come with sculpting in it. But since then, I've leveled up significantly and switched to more advanced tools. So this second version of Stitch was born in ZBrush. By the time I started working on this Stitch, ZBrush had already become my second main workspace. I've used it to deliver tons of commercial projects, I work in it almost daily, and most of my portfolio was created using this tool. I found some great reference images showing Stitch's body structure. Among them were official movie references and a stunning high-poly model created by Juan Hernández, a version of Stitch without fur. That model became my primary reference for sculpting.Truth is, Stitch's base form is quite simple, so blocking out the shape didn't take too long. When blocking, I use Blender in combination with ZBrush:I work with primary forms in ZBrushThen check proportions in BlenderFix mistakes, tweak volumes, and refine the silhouetteSince Stitch's shape isn't overly complex, I broke him down into three main sculpting parts:The body: arms, legs, head, and earsThe nose, eyes, and mouth cavityWhile planning the sculpt, I already knew I'd be rigging Stitch, both body and facial rig. So I started sculpting with his mouth open.While studying various references, I noticed something interesting. Stitch from promotional posters, Stitch from the movie, and Stitch as recreated by different artists on ArtStation all look very different from one another. What surprised me the most was how different the promo version of Stitch is compared to the one in the actual movie. They are essentially two separate models:Different proportionsDifferent shapesDifferent texturesEven different fur and overall designThis presented a creative challenge, I had to develop my own take on Stitch's design. Sometimes I liked the way the teeth were done in one version, in another, the eye placement, in another, the fur shape, or the claw design on hands and feet.At first, considering that Stitch is completely covered in fur from head to toe, sculpting his underlying anatomy seemed pointless. I kept asking myself: "Why sculpt muscles and skin detail if everything will be hidden under fur anyway?"But eventually, I found a few solid answers for myself. First, having a defined muscle structure actually makes the fur grooming process easier. That's because fur often follows the flow of muscle lines, so having those muscles helps guide fur direction more accurately across the character's body.Second, it's great anatomy practice, and practice is never a waste. So, I found a solid anatomical reference of Stitch with clearly visible muscle groups and tried to recreate that structure as closely as possible in my own sculpt.In the end, I had to develop a full visual concept by combining elements from multiple versions of Stitch. Through careful reference work and constantly switching between Blender and ZBrush, I gradually, but intentionally, built up the body and overall look of our favorite fluffy alien.Topology & UVsThroughout the sculpting process, I spent quite a bit of time thinking about topology. I was looking for the most balanced solution between quality and production time. Normally, I do manual retopology for my characters, but this time, I knew it would take too much time, and honestly, I didn't have that luxury.So I decided to generate the topology using ZBrush's tools. I split the model into separate parts using Polygroups, assigning individual groups for the ears, the head, the torso, the arms, the legs, and each of Stitch's fingers.With the Polygroups in place, I used ZRemesher with Keep Groups enabled and smoothing on group borders. This gave me a clean and optimized mesh that was perfect for UV unwrapping.Of course, this kind of auto-retopology isn't a full substitute for manual work, but it saved me a huge amount of time, and the quality was still high enough for what I needed. However, there was one tricky issue. Although Stitch looks symmetrical at first glance, his ears are actually asymmetrical. The right ear has a scar on the top, while the left has a scar on the bottomBecause of that, I couldn't just mirror one side in ZBrush without losing those unique features. Here's what I ended up doing: I created a symmetrical model with the right ear, then another symmetrical model with the left ear. I brought both into Blender, detached the left ear from one model, and attached it to the body of the other one. This way, I got a clean, symmetrical base mesh with asymmetrical ears, preserving both topology and detail. And thanks to the clean polygroup-based layout, I was able to unwrap the UVs with nice, even seams and clean islands.When it came to UV mapping, I divided Stitch into two UDIM tiles:The first UDIM includes the head with ears, torso, arms, and legs.The second UDIM contains all the additional parts: teeth, tongue, gums, claws, and noseSince the nose is one of the most important details, I allocated the largest space to it, which helped me to better capture its intricate details.As for the eyes, I used procedural eyes, so there was no need to assign UV space or create a separate UDIM for texturing them. To achieve this, I used the Tiny Eye add-on by tinynocky for Blender, which allows full control over procedural eyes and their parameters.This approach gave me high-quality eyes with customizable elements tailored exactly to my needs. As a result of all these steps, Stitch ended up with a symmetrical, optimized mesh, asymmetrical ears, and the body split across two UDIMs, one for the main body and one for the additional parts.TexturingWhen planning Stitch's texturing, I understood that the main body texture would be fairly simple, with much of the visual detail enhanced by the fur. However, there were some areas that required much more attention than the rest of the body. The textures for Stitch can be roughly divided into several main parts:The base body, which includes the primary color of his fur, along with additional shading like a lighter tone on the frontand a darker tone on the back and napeThe nose and ears, these zones, demanded separate focusAt the initial texturing/blocking stage, the ears looked too cartoony, which didn’t fit the style I wanted. So, I decided to push them towards a more realistic look. This involved removing bright colors, adding more variation in the roughness map, introducing variation in the base color, and making the ears visually more natural, layered, and textured on the surface. By combining smart materials and masks, I achieved the effect of "living" ears, slightly dirty and looking as natural as possible.The nose was a separate story. It occupies a significant part of the face and thus draws a lot of attention. While studying references, I noticed that the shape and texture of the nose vary a lot between different artists. Initially, I made it dog-like, with some wear and tear around the nostrils and base.For a long time, I thought this version was acceptable. But during test renders, I realized the nose needed improvement. So I reworked its texturing, aiming to make it more detailed. I divided the nose texture into four main layers:Base detail: Baked from the high-poly model. Over this, I applied a smart skin material that added characteristic bumps.Lighter layer: Applied via a mask using the AO channel. This darkened the crevices and brightened the bumps, creating a multi-layered effect.Organic detail: In animal references, I noticed slight redness in the nose area. I created another AO-masked layer with reddish capillaries visible through the bumps, adding depth and realism.Softness: To make the nose visually softer, like in references, I added a fill layer with only height enabled, used a paper texture as grayscale, and applied a blurred mask. This created subtle dents and wrinkles that softened the look.All textures were created in 4K resolution to achieve maximum detail. After finishing the main texturing stage, I add an Ambient Occlusion map on the final texture layer, activating only the Color channel, setting the blend mode to Multiply, and reducing opacity to about 35%. This adds volume and greatly improves the overall perception of the model.That covers the texturing of Stitch’s body. I also created a separate texture for the fur. This was simpler, I disabled unnecessary layers like ears and eyelids, and left only the base ones corresponding to the body’s color tones.During grooming, I also created textures for the fur's clamps and roughness. In Substance 3D Painter, I additionally painted masks for better fur detail.FurAnd finally, I moved on to the part that was most important to me, the very reason I started this project in the first place. Fur. This entire process was essentially a test of my fur grooming skills. After overcoming self-doubt, I trusted the process and relied on everything I had learned so far. Before diving into the grooming itself, I made sure to gather strong references. I searched for the highest quality and most inspiring examples I could find and analyzed them thoroughly. My goal was to clearly understand the direction of fur growth, its density and volume, the intensity of roughness, and the strength of clumping in different areas of Stitch's body.To create the fur, I used Blender and its Hair Particle System. The overall approach is similar to sculpting a high-detail model: work from broad strokes to finer details. So, the first step was blocking out the main flow and placement of the hair strands.At this point, I ran into a challenge: symmetry. Since the model was purposefully asymmetrical, the fur couldn't be mirrored cleanly. To solve this, I created a base fur blocking using Hair Guides with just two segments. After that, I split the fur into separate parts. I duplicated the main Particle System and created individual hair systems for each area where needed.In total, I broke Stitch's body into key sections: head, left ear, right ear, front torso, back torso, arms, hands, upper and lower legs, toes, and additional detailing layers. The final fur setup included 25 separate particle systems.To control fur growth, I used Weight Paint to fine-tune the influence on each body part individually. This separation gave me much more precision and allowed full control over every parameter of the fur on a per-section basis.The most challenging aspect of working with fur is staying patient and focused. Detail is absolutely critical because the overall picture is built entirely from tiny, subtle elements. Once the base layer was complete, I moved on to refining the fur based on my references.The most complex areas turned out to be the front of the torso and the face. When working on the torso, my goal was to create a smooth gradient, from thick, clumped fur on the chest to shorter, softer fur on the stomach.Step by step, I adjusted the transitions, directions, clumps, and volumes to achieve that look. Additionally, I used the fur itself to subtly enhance Stitch's silhouette, making his overall shape feel sharper, more expressive, and visually engaging.During fur development, I used texture maps to control the intensity of the Roughness and Clump parameters. This gave me a high degree of flexibility, textures drove these attributes across the entire model. In areas where stronger clumping or roughness was needed, I used brighter values; in zones requiring a softer look, darker values. This approach allowed for fine-tuned micro-level control of the fur shader and helped achieve a highly realistic appearance in renders.The face required special attention: the fur had to be neat, evenly distributed, and still visually appealing. The biggest challenge here was working around the eye area. Even with properly adjusted Weight Paint, interpolation sometimes caused strands to creep into the eyes.I spent a lot of time cleaning up this region to get an optimal result. I also had to revisit certain patches that looked bald, even though interpolation and weight painting were set correctly, because the fur didn't render properly there. These areas needed manual fixing.As part of the detailing stage, I also increased the number of segments in the Hair Guides.While the blocking phase only used two segments, I went up to three, and in some cases even five, for more complex regions. This gave me much more control over fur shape and flow.The tiniest details really matter, so I added extra fur layers with thinner, more chaotic strands extending slightly beyond the main silhouette. These micro-layers significantly improved the texture depth and boosted the overall realism.Aside from the grooming itself, I paid special attention to the fur material setup, as the shader plays a critical role in the final visual quality of the render. It's not enough to simply plug a color texture into a Principled BSDF node and call it done.I built a more complex shader, giving me precise control over various attributes. For example, I implemented subtle color variation across individual strands, along with darkening near the roots and a gradual brightening toward the tips. This helped add visual depth and made the fur look significantly more natural and lifelike.Working on the fur took up nearly half of the total time I spent on the entire model. And I'm genuinely happy with the result, this stage confirmed that the training I've gone through was solid and that I’m heading in the right direction with my artistic development.Rigging, Posing & SceneOnce I finished working on the fur, I rendered several 4K test shots from different angles to make sure every detail looked the way I intended. When I was fully satisfied with the results, it was time to move on to rigging.I divided the rigging process into three main parts:Body rig, for posing and positioning the characterFacial rig, for expressions and emotionsEar rig, for dynamic ear controlRigging isn't something I consider my strongest skill, but as a 3D generalist, I had to dive into many technical aspects of it. For the ears, I set up a relatively simple system with several bones connected using inverse kinematics. This gave me flexible and intuitive control during posing and allowed for the addition of dynamic movement in animation.For facial rigging, I used the FaceIt add-on, which generates a complete facial control system for mouth, eyes, and tongue. It sped up the process significantly and gave me more precision. For the body, I used the ActorCore Rig by NVIDIA, then converted it to Rigify, which gave me a familiar interface and flexible control over poses.Posing is one of my favorite stages, it's when the character really comes to life. As usual, it started with gathering references. Honestly, it was hard to pick the final poses, Stitch is so expressive and full of personality that I wanted to try hundreds of them. But I focused on those that best conveyed the spirit and mood of the character. Some poses I reworked to fit my style rather than copying directly. For example, in the pose where Stitch licks his nose, I added drool and a bit of "green slime" for comedic effect. To capture motion, I tilted his head back and made the ears fly upward, creating a vivid, emotional snapshot.Just like in sculpting or grooming, minor details make a big difference in posing. Examples include: a slight asymmetry in the facial expression, a raised corner of the mouth, one eye squinting a little more than the other, and ears set at slightly different angles.These are subtle things that might not be noticed immediately, but they’re the key to making the character feel alive and believable.For each pose, I created a separate scene and collection in Blender, including the character, specific lighting setup, and a simple background or environment. This made it easy to return to any scene later, to adjust lighting, reposition the character, or tweak the background.In one of the renders, which I used as the cover image, Stitch is holding a little frog.I want to clearly note that the 3D model of the frog is not mine, full credit goes to the original author of the asset.At first, I wanted to build a full environment around Stitch, to create a scene that would feel like a frame from a film. But after carefully evaluating my skills and priorities, I decided that a weak environment would only detract from the strength of the character. So I opted for a simple, neutral backdrop, designed to keep all the focus on Stitch himself.Rendering, Lighting & Post-ProcessingWhen the character is complete, posed expressively, and integrated into the scene, there's one final step: lighting. Lighting isn't just a technical element of the scene — it’s a full-fledged stage of the 3D pipeline. It doesn't just illuminate; it paints. Proper lighting can highlight the personality of the character, emphasize forms, and create atmosphere.For all my renders, I rely on the classic three-point lighting setup: Key Light, Fill Light, and Rim Light.While this setup is well-known, it remains highly effective. When done thoughtfully, with the right intensity, direction, and color temperature, it creates a strong light-shadow composition that brings the model to life. In addition to the three main lights, I also use an HDRI map, but with very low intensity, around 0.3, just enough to subtly enrich the ambient light without overpowering the scene.Once everything is set, it's time to hit Render and wait for the result. Due to hardware limitations, I wasn’t able to produce full animated shots with fur. Rendering a single 4K image with fur took over an hour, so I limited myself to a 360° turnaround and several static renders.I don't spend too much time on post-processing, just basic refinements in Photoshop. Slight enhancement of the composition, gentle shadow adjustments, color balance tweaks, and adding a logo. Everything is done subtly, nothing overprocessed. The goal is simply to support and enhance what’s already there.Final ThoughtsThis project has been an incredible experience. Although it was my second time creating Stitch, this time the process felt completely different at every stage. And honestly, it wasn't easy.But that was exactly the point: to challenge myself. To reimagine something familiar, to try things I'd never done before, and to walk the full journey from start to finish. The fur, the heart of this project, was especially meaningful to me. It’s what started it all. I poured a lot into this model: time, effort, emotion, and even doubts. But at the same time, I brought all my knowledge, skills, and experience into it.This work became a mirror of my progress from 2023 to 2025. I can clearly see how far I've come, and that gives me the motivation to keep going. Every hour of learning and practice paid off, the results speak for themselves. This model was created for my portfolio. I don't plan to use it commercially, unless, of course, a studio actually wants to license it for a new filmIt's been a long road: challenging, sometimes exhausting, but above all inspiring and exciting. I know there's still a lot to learn. Many things to study, improve, and polish to perfection. But I'm already on that path, and I'm not stopping.Oleh Yakushev, 3D Character ArtistInterview conducted by Gloria Levine #fur #grooming #techniques #realistic #stitch
    Fur Grooming Techniques For Realistic Stitch In Blender
    80.lv
    IntroductionHi everyone! My name is Oleh Yakushev, and I'm a 3D Artist from Ukraine. My journey into 3D began just three years ago, when I was working as a mobile phone salesperson at a shopping mall. In 2022, during one slow day at work, I noticed a colleague learning Python. We started talking about life goals. I told him I wanted to switch careers, to do something creative, but programming wasn't really my thing.He asked me a simple question: "Well, what do you actually enjoy doing?"I said, "Video games. I love video games. But I don't have time to learn how to make them, I've got a job, a family, and a kid."Then he hit me with something that really shifted my whole perspective."Oleh, do you play games on your PlayStation?"I said, "Of course."He replied, "Then why not take the time you spend playing and use it to learn how to make games?"That moment flipped a switch in my mind. I realized that I did have time, it was just a matter of how I used it. If I really wanted to learn, I could find a way. At the time, I didn't even own a computer. But where there's a will, there's a way: I borrowed my sister's laptop for a month and started following beginner 3D tutorials on YouTube. Every night after work, once my family went to sleep, I'd sit in the kitchen and study. I stayed up until 2 or 3 AM, learning Blender basics. Then I'd sleep for a few hours before waking up at 6 AM to go back to work. That's how I spent my first few months in 3D, studying every single night.3D completely took over my life. During lunch breaks, I watched 3D videos, on the bus, I scrolled through 3D TikToks, at home, I took 3D courses, and the word "3D" just became a constant in my vocabulary.After a few months of learning the basics, I started building my portfolio, which looks pretty funny to me now. But at the time, it was a real sign of how committed I was. Eventually, someone reached out to me through Behance, offering my first freelance opportunity. And thatэs how my journey began, from mall clerk to 3D artist. It's been a tough road, full of burnout, doubts, and late nights... but also full of curiosity, growth, and hope. And I wouldn't trade it for anything.The Stitch ProjectI've loved Stitch since I was a kid. I used to watch the cartoons, play the video games, and he always felt like such a warm, funny, chill, and at the same time, strong character. So once I reached a certain level in 3D, I decided to recreate Stitch.Back then, my skills only allowed me to make him in a stylized cartoonish style, no fur, no complex detailing, no advanced texturing, I just didn't have the experience. Surprisingly, the result turned out pretty decent. Even now, I sometimes get comments that my old Stitch still looks quite cute. Though honestly, I wouldn't say that myself anymore. Two years have passed since I made that first Stitch, it was back in 2023. And in 2025, I decided it was time to challenge myself.At that point, I had just completed an intense grooming course. Grooming always intimidated me, it felt really complex. I avoided it on commercial projects, made a few failed attempts for my portfolio, and overall tried to steer clear of any tasks where grooming was required. But eventually, I found the strength to face it.I pushed myself to learn how to make great fur, and I did. I finally understood how the grooming system works, grasped the logic, the tools, and the workflow. And after finishing the course, I wanted to lock in all that knowledge by creating a full personal project from scratch.So my goal was to make a character from the ground up, where the final stage would be grooming. And without thinking too long, I chose Stitch.First, because I truly love the character. Second, I wanted to clearly see my own progress over the past two years. Third, I needed to put my new skills to the test and find out whether my training had really paid off.ModelingI had a few ideas for how to approach the base mesh for this project. First, to model everything completely from scratch, starting with a sphere. Second, to reuse my old Stitch model and upgrade it.But then an idea struck me: why not test how well AI could handle a base mesh? I gathered some references and tried generating a base mesh using AI, uploading Stitch visuals as a guide. As you can see from the screenshot, the result was far from usable. So I basically ended up doing everything from scratch anyway.So, I went back to basics: digging through ArtStation and Pinterest, collecting references. Since over the last two years, I had not only learned grooming but also completely changed my overall approach to character creation, it was important for me to make a more detailed model, even if much of it would be hidden under fur.The first Stitch was sculpted in Blender, with all the limitations that come with sculpting in it. But since then, I've leveled up significantly and switched to more advanced tools. So this second version of Stitch was born in ZBrush. By the time I started working on this Stitch, ZBrush had already become my second main workspace. I've used it to deliver tons of commercial projects, I work in it almost daily, and most of my portfolio was created using this tool. I found some great reference images showing Stitch's body structure. Among them were official movie references and a stunning high-poly model created by Juan Hernández, a version of Stitch without fur. That model became my primary reference for sculpting.Truth is, Stitch's base form is quite simple, so blocking out the shape didn't take too long. When blocking, I use Blender in combination with ZBrush:I work with primary forms in ZBrushThen check proportions in BlenderFix mistakes, tweak volumes, and refine the silhouetteSince Stitch's shape isn't overly complex, I broke him down into three main sculpting parts:The body: arms, legs, head, and earsThe nose, eyes, and mouth cavityWhile planning the sculpt, I already knew I'd be rigging Stitch, both body and facial rig. So I started sculpting with his mouth open (to later close it and have more flexibility when it comes to rigging and deformation).While studying various references, I noticed something interesting. Stitch from promotional posters, Stitch from the movie, and Stitch as recreated by different artists on ArtStation all look very different from one another. What surprised me the most was how different the promo version of Stitch is compared to the one in the actual movie. They are essentially two separate models:Different proportionsDifferent shapesDifferent texturesEven different fur and overall designThis presented a creative challenge, I had to develop my own take on Stitch's design. Sometimes I liked the way the teeth were done in one version, in another, the eye placement, in another, the fur shape, or the claw design on hands and feet.At first, considering that Stitch is completely covered in fur from head to toe, sculpting his underlying anatomy seemed pointless. I kept asking myself: "Why sculpt muscles and skin detail if everything will be hidden under fur anyway?"But eventually, I found a few solid answers for myself. First, having a defined muscle structure actually makes the fur grooming process easier. That's because fur often follows the flow of muscle lines, so having those muscles helps guide fur direction more accurately across the character's body.Second, it's great anatomy practice, and practice is never a waste. So, I found a solid anatomical reference of Stitch with clearly visible muscle groups and tried to recreate that structure as closely as possible in my own sculpt.In the end, I had to develop a full visual concept by combining elements from multiple versions of Stitch. Through careful reference work and constantly switching between Blender and ZBrush, I gradually, but intentionally, built up the body and overall look of our favorite fluffy alien.Topology & UVsThroughout the sculpting process, I spent quite a bit of time thinking about topology. I was looking for the most balanced solution between quality and production time. Normally, I do manual retopology for my characters, but this time, I knew it would take too much time, and honestly, I didn't have that luxury.So I decided to generate the topology using ZBrush's tools. I split the model into separate parts using Polygroups, assigning individual groups for the ears, the head, the torso, the arms, the legs, and each of Stitch's fingers.With the Polygroups in place, I used ZRemesher with Keep Groups enabled and smoothing on group borders. This gave me a clean and optimized mesh that was perfect for UV unwrapping.Of course, this kind of auto-retopology isn't a full substitute for manual work, but it saved me a huge amount of time, and the quality was still high enough for what I needed. However, there was one tricky issue. Although Stitch looks symmetrical at first glance, his ears are actually asymmetrical. The right ear has a scar on the top, while the left has a scar on the bottomBecause of that, I couldn't just mirror one side in ZBrush without losing those unique features. Here's what I ended up doing: I created a symmetrical model with the right ear, then another symmetrical model with the left ear. I brought both into Blender, detached the left ear from one model, and attached it to the body of the other one. This way, I got a clean, symmetrical base mesh with asymmetrical ears, preserving both topology and detail. And thanks to the clean polygroup-based layout, I was able to unwrap the UVs with nice, even seams and clean islands.When it came to UV mapping, I divided Stitch into two UDIM tiles:The first UDIM includes the head with ears, torso, arms, and legs.The second UDIM contains all the additional parts: teeth, tongue, gums, claws, and nose (For the claws, I used overlapping UVs to preserve texel density for the other parts)Since the nose is one of the most important details, I allocated the largest space to it, which helped me to better capture its intricate details.As for the eyes, I used procedural eyes, so there was no need to assign UV space or create a separate UDIM for texturing them. To achieve this, I used the Tiny Eye add-on by tinynocky for Blender, which allows full control over procedural eyes and their parameters.This approach gave me high-quality eyes with customizable elements tailored exactly to my needs. As a result of all these steps, Stitch ended up with a symmetrical, optimized mesh, asymmetrical ears, and the body split across two UDIMs, one for the main body and one for the additional parts.TexturingWhen planning Stitch's texturing, I understood that the main body texture would be fairly simple, with much of the visual detail enhanced by the fur. However, there were some areas that required much more attention than the rest of the body. The textures for Stitch can be roughly divided into several main parts:The base body, which includes the primary color of his fur, along with additional shading like a lighter tone on the front (belly) and a darker tone on the back and napeThe nose and ears, these zones, demanded separate focusAt the initial texturing/blocking stage, the ears looked too cartoony, which didn’t fit the style I wanted. So, I decided to push them towards a more realistic look. This involved removing bright colors, adding more variation in the roughness map, introducing variation in the base color, and making the ears visually more natural, layered, and textured on the surface. By combining smart materials and masks, I achieved the effect of "living" ears, slightly dirty and looking as natural as possible.The nose was a separate story. It occupies a significant part of the face and thus draws a lot of attention. While studying references, I noticed that the shape and texture of the nose vary a lot between different artists. Initially, I made it dog-like, with some wear and tear around the nostrils and base.For a long time, I thought this version was acceptable. But during test renders, I realized the nose needed improvement. So I reworked its texturing, aiming to make it more detailed. I divided the nose texture into four main layers:Base detail: Baked from the high-poly model. Over this, I applied a smart skin material that added characteristic bumps.Lighter layer: Applied via a mask using the AO channel. This darkened the crevices and brightened the bumps, creating a multi-layered effect.Organic detail (capillaries): In animal references, I noticed slight redness in the nose area. I created another AO-masked layer with reddish capillaries visible through the bumps, adding depth and realism.Softness: To make the nose visually softer, like in references, I added a fill layer with only height enabled, used a paper texture as grayscale, and applied a blurred mask. This created subtle dents and wrinkles that softened the look.All textures were created in 4K resolution to achieve maximum detail. After finishing the main texturing stage, I add an Ambient Occlusion map on the final texture layer, activating only the Color channel, setting the blend mode to Multiply, and reducing opacity to about 35%. This adds volume and greatly improves the overall perception of the model.That covers the texturing of Stitch’s body. I also created a separate texture for the fur. This was simpler, I disabled unnecessary layers like ears and eyelids, and left only the base ones corresponding to the body’s color tones.During grooming (which I'll cover in detail later), I also created textures for the fur's clamps and roughness. In Substance 3D Painter, I additionally painted masks for better fur detail.FurAnd finally, I moved on to the part that was most important to me, the very reason I started this project in the first place. Fur. This entire process was essentially a test of my fur grooming skills. After overcoming self-doubt, I trusted the process and relied on everything I had learned so far. Before diving into the grooming itself, I made sure to gather strong references. I searched for the highest quality and most inspiring examples I could find and analyzed them thoroughly. My goal was to clearly understand the direction of fur growth, its density and volume, the intensity of roughness, and the strength of clumping in different areas of Stitch's body.To create the fur, I used Blender and its Hair Particle System. The overall approach is similar to sculpting a high-detail model: work from broad strokes to finer details. So, the first step was blocking out the main flow and placement of the hair strands.At this point, I ran into a challenge: symmetry. Since the model was purposefully asymmetrical (because of the ears and skin folds), the fur couldn't be mirrored cleanly. To solve this, I created a base fur blocking using Hair Guides with just two segments. After that, I split the fur into separate parts. I duplicated the main Particle System and created individual hair systems for each area where needed.In total, I broke Stitch's body into key sections: head, left ear, right ear, front torso, back torso, arms, hands, upper and lower legs, toes, and additional detailing layers. The final fur setup included 25 separate particle systems.To control fur growth, I used Weight Paint to fine-tune the influence on each body part individually. This separation gave me much more precision and allowed full control over every parameter of the fur on a per-section basis.The most challenging aspect of working with fur is staying patient and focused. Detail is absolutely critical because the overall picture is built entirely from tiny, subtle elements. Once the base layer was complete, I moved on to refining the fur based on my references.The most complex areas turned out to be the front of the torso and the face. When working on the torso, my goal was to create a smooth gradient, from thick, clumped fur on the chest to shorter, softer fur on the stomach.Step by step, I adjusted the transitions, directions, clumps, and volumes to achieve that look. Additionally, I used the fur itself to subtly enhance Stitch's silhouette, making his overall shape feel sharper, more expressive, and visually engaging.During fur development, I used texture maps to control the intensity of the Roughness and Clump parameters. This gave me a high degree of flexibility, textures drove these attributes across the entire model. In areas where stronger clumping or roughness was needed, I used brighter values; in zones requiring a softer look, darker values. This approach allowed for fine-tuned micro-level control of the fur shader and helped achieve a highly realistic appearance in renders.The face required special attention: the fur had to be neat, evenly distributed, and still visually appealing. The biggest challenge here was working around the eye area. Even with properly adjusted Weight Paint, interpolation sometimes caused strands to creep into the eyes.I spent a lot of time cleaning up this region to get an optimal result. I also had to revisit certain patches that looked bald, even though interpolation and weight painting were set correctly, because the fur didn't render properly there. These areas needed manual fixing.As part of the detailing stage, I also increased the number of segments in the Hair Guides.While the blocking phase only used two segments, I went up to three, and in some cases even five, for more complex regions. This gave me much more control over fur shape and flow.The tiniest details really matter, so I added extra fur layers with thinner, more chaotic strands extending slightly beyond the main silhouette. These micro-layers significantly improved the texture depth and boosted the overall realism.Aside from the grooming itself, I paid special attention to the fur material setup, as the shader plays a critical role in the final visual quality of the render. It's not enough to simply plug a color texture into a Principled BSDF node and call it done.I built a more complex shader, giving me precise control over various attributes. For example, I implemented subtle color variation across individual strands, along with darkening near the roots and a gradual brightening toward the tips. This helped add visual depth and made the fur look significantly more natural and lifelike.Working on the fur took up nearly half of the total time I spent on the entire model. And I'm genuinely happy with the result, this stage confirmed that the training I've gone through was solid and that I’m heading in the right direction with my artistic development.Rigging, Posing & SceneOnce I finished working on the fur, I rendered several 4K test shots from different angles to make sure every detail looked the way I intended. When I was fully satisfied with the results, it was time to move on to rigging.I divided the rigging process into three main parts:Body rig, for posing and positioning the characterFacial rig, for expressions and emotionsEar rig, for dynamic ear controlRigging isn't something I consider my strongest skill, but as a 3D generalist, I had to dive into many technical aspects of it. For the ears, I set up a relatively simple system with several bones connected using inverse kinematics (IK). This gave me flexible and intuitive control during posing and allowed for the addition of dynamic movement in animation.For facial rigging, I used the FaceIt add-on, which generates a complete facial control system for mouth, eyes, and tongue. It sped up the process significantly and gave me more precision. For the body, I used the ActorCore Rig by NVIDIA, then converted it to Rigify, which gave me a familiar interface and flexible control over poses.Posing is one of my favorite stages, it's when the character really comes to life. As usual, it started with gathering references. Honestly, it was hard to pick the final poses, Stitch is so expressive and full of personality that I wanted to try hundreds of them. But I focused on those that best conveyed the spirit and mood of the character. Some poses I reworked to fit my style rather than copying directly. For example, in the pose where Stitch licks his nose, I added drool and a bit of "green slime" for comedic effect. To capture motion, I tilted his head back and made the ears fly upward, creating a vivid, emotional snapshot.Just like in sculpting or grooming, minor details make a big difference in posing. Examples include: a slight asymmetry in the facial expression, a raised corner of the mouth, one eye squinting a little more than the other, and ears set at slightly different angles.These are subtle things that might not be noticed immediately, but they’re the key to making the character feel alive and believable.For each pose, I created a separate scene and collection in Blender, including the character, specific lighting setup, and a simple background or environment. This made it easy to return to any scene later, to adjust lighting, reposition the character, or tweak the background.In one of the renders, which I used as the cover image, Stitch is holding a little frog.I want to clearly note that the 3D model of the frog is not mine, full credit goes to the original author of the asset.At first, I wanted to build a full environment around Stitch, to create a scene that would feel like a frame from a film. But after carefully evaluating my skills and priorities, I decided that a weak environment would only detract from the strength of the character. So I opted for a simple, neutral backdrop, designed to keep all the focus on Stitch himself.Rendering, Lighting & Post-ProcessingWhen the character is complete, posed expressively, and integrated into the scene, there's one final step: lighting. Lighting isn't just a technical element of the scene — it’s a full-fledged stage of the 3D pipeline. It doesn't just illuminate; it paints. Proper lighting can highlight the personality of the character, emphasize forms, and create atmosphere.For all my renders, I rely on the classic three-point lighting setup: Key Light, Fill Light, and Rim Light.While this setup is well-known, it remains highly effective. When done thoughtfully, with the right intensity, direction, and color temperature, it creates a strong light-shadow composition that brings the model to life. In addition to the three main lights, I also use an HDRI map, but with very low intensity, around 0.3, just enough to subtly enrich the ambient light without overpowering the scene.Once everything is set, it's time to hit Render and wait for the result. Due to hardware limitations, I wasn’t able to produce full animated shots with fur. Rendering a single 4K image with fur took over an hour, so I limited myself to a 360° turnaround and several static renders.I don't spend too much time on post-processing, just basic refinements in Photoshop. Slight enhancement of the composition, gentle shadow adjustments, color balance tweaks, and adding a logo. Everything is done subtly, nothing overprocessed. The goal is simply to support and enhance what’s already there.Final ThoughtsThis project has been an incredible experience. Although it was my second time creating Stitch (the first was back in 2023), this time the process felt completely different at every stage. And honestly, it wasn't easy.But that was exactly the point: to challenge myself. To reimagine something familiar, to try things I'd never done before, and to walk the full journey from start to finish. The fur, the heart of this project, was especially meaningful to me. It’s what started it all. I poured a lot into this model: time, effort, emotion, and even doubts. But at the same time, I brought all my knowledge, skills, and experience into it.This work became a mirror of my progress from 2023 to 2025. I can clearly see how far I've come, and that gives me the motivation to keep going. Every hour of learning and practice paid off, the results speak for themselves. This model was created for my portfolio. I don't plan to use it commercially, unless, of course, a studio actually wants to license it for a new film (in that case, I'd be more than happy!)It's been a long road: challenging, sometimes exhausting, but above all inspiring and exciting. I know there's still a lot to learn. Many things to study, improve, and polish to perfection. But I'm already on that path, and I'm not stopping.Oleh Yakushev, 3D Character ArtistInterview conducted by Gloria Levine
    Like
    Love
    Wow
    Sad
    Angry
    574
    · 2 Comments ·0 Shares
  • (For Southeast Asia) NBA 2K26: Hands-on report and PS5 bundle details

    The official start of the season may be two months away, but basketball is back with NBA 2K26 hitting PS5 and PS4 September 5. The latest entry brings a new gameplay system powered by machine learning, studying today’s superstars, and fun pick-up and play options. 2K invited me to go hands-on with the game  before it launches September 5 on PS5, and I’m here to share what I learned on the court.

    Also launching starting on September 12and on September 18is the PlayStation 5 Console – NBA 2K26 Bundle. Read on for full details

    Better ball

    2K26 puts considerable effort into improving both sides of the floor, with notable offensive and defensive enhancements. New machine-learning technology helps capture the fundamentals of the game. While playing, I noticed players would run and get set by firmly planting their feet, instead of a gliding effect. While driving into the paint, they would also stop and accurately respond to a defender in their lane. These details add a realistic weight to the sport.

    Enhanced Rhythm Shooting

    You can still flick down-up on the right analog stick or simply press square to start your shooting motion, then release at the correct timing for the individual player’s shoot release. However, now the tempo of the play, like in real life, affects your shot. When a good defender bogged me down, I could quickly release my shot and intentionally release it early for a decisive bucket. With a high basketball IQ, any shot has the potential to be a good shot. 

    Defensive battles

    Players can swing a game in their favor if the shots aren’t falling, thanks to new improvements centered around real-world tactics. Around the player’s feet, you will see new Rebound Timing Feedback as a green meter that will flash to indicate a well-timed rebound. Learning Chet Holmgren’s rebound timing made me nearly unstoppable under the rim and made me focus on an aspect of the game I had neglected before. 

    Collisions and interior defense both benefit from a revamped system-driven tech that allows for more real-time interactions instead of scripted mocap animations. If you want to stop a fast break or crowd the lane, players will stop, adjust, and even collide realistically. The game rewards paying attention to the action when the ball isn’t in your hand.

    Arena atmosphere

    The devs also upgraded the game spectacle during downtime and timeouts with new crowd variety, interactions, and on-court performances. Cheerleader routines and mascot antics are fun, but my favorite by far was the dance cam. These moments captured the feel of attending a game live and the sense of community that attending a sporting event can create.

    MyTEAM updates 

    MyTEAM has received a significant remodel with Triple Threat Park turning Sunset Beach into a nighttime venue. Players are greeted with neon lights, fireworks, and other details that can only be appreciated after dark. Pulling cards and collecting players has also become an even bigger spectacle with dramatic reveals and added flair.  

    The biggest change to MyTEAM is that WNBA players join the action for the first time in series history. Newcomers like Angel Reese and Caitlin Clark take to the hardwood along with legends like Lisa Leslie. Attributes and Badges are identical for all players, no matter what league they hail from. Also, there is a WNBA Domination tier where your squad will be exclusively WNBA players as you challenge teams to earn Domination stars and crests. 

    Another first is 2v2 games in Triple Threat Park. Two half courts have been added in the middle of the street, where you can run your favorite two-person team-ups. The park also features four 3v3 courts, including a new option with a beach backdrop, and three 3v3 courts for 6-player co-op matches. These games capture the essence of streetball, featuring players calling their fouls, checking the ball at midcourt, and engaging in some lively trash talk—a great way to mix and match your favorite ball players and have some quick, high-energy games. 

    All-Star Team Up is now part of MyTEAM, where 10 players duke it out in 5v5 co-op matches. Take your favorite NBA or WNBA players for some very high-level play where being a good role player is the key to success. Earn individual rewards with the new Season Ladder and earn rewards as a team by winning matches. Find the right chemistry with your teammates, because for every five games you win with the same team lineup, everyone will receive rewards, even if the wins aren’t consecutive. 

    Discover all the new enhancements coming to the court when NBA 2K 26 launches September 5 on PS5.

    Vertical Stand sold separately

    PS5 Console – NBA 2K26 BundleWe’re pleased to announce the PlayStation 5 Console – NBA 2K26 Bundle is launching in Singapore, Malaysia, Thailand starting September 12 and is launching in Indonesia, the Philippines and Vietnam starting September 18. Release dates and availability may vary by region, please check your local retailer for availability and release dates.

    Players can feel the on-the-court immersion made possible by the DualSense wireless controller’s haptic feedback and adaptive triggers. Experience NBA 2K26’s authenticity with lifelike animations, heightened player fidelity and authentic atmosphere with 4K resolution*, and enjoy shortened load times and return to the action faster with the PS5 console’s high-speed SSD.

    In Singapore, Malaysia and Thailand, the bundle includes a PlayStation 5 console, DualSense wireless controller, and a digital voucher** for NBA 2K26 Standard Edition. In Indonesia, the Philippines and Vietnam, the bundle includes a PlayStation 5 console, DualSense wireless controller, and a disc version for NBA 2K26 Standard Edition

    With a robust focus on features and the game aspects that don’t rely on the players, it’s great to play and watch. No matter your height, you should hit the court when NBA 2K26 comes to PS5 and PS4 on September 5.

    *4K and HDR require a 4K and HDR compatible TV or display.

    **Account for PlayStation and internet connection required to redeem voucher
    #southeast #asia #nba #2k26 #handson
    (For Southeast Asia) NBA 2K26: Hands-on report and PS5 bundle details
    The official start of the season may be two months away, but basketball is back with NBA 2K26 hitting PS5 and PS4 September 5. The latest entry brings a new gameplay system powered by machine learning, studying today’s superstars, and fun pick-up and play options. 2K invited me to go hands-on with the game  before it launches September 5 on PS5, and I’m here to share what I learned on the court. Also launching starting on September 12and on September 18is the PlayStation 5 Console – NBA 2K26 Bundle. Read on for full details Better ball 2K26 puts considerable effort into improving both sides of the floor, with notable offensive and defensive enhancements. New machine-learning technology helps capture the fundamentals of the game. While playing, I noticed players would run and get set by firmly planting their feet, instead of a gliding effect. While driving into the paint, they would also stop and accurately respond to a defender in their lane. These details add a realistic weight to the sport. Enhanced Rhythm Shooting You can still flick down-up on the right analog stick or simply press square to start your shooting motion, then release at the correct timing for the individual player’s shoot release. However, now the tempo of the play, like in real life, affects your shot. When a good defender bogged me down, I could quickly release my shot and intentionally release it early for a decisive bucket. With a high basketball IQ, any shot has the potential to be a good shot.  Defensive battles Players can swing a game in their favor if the shots aren’t falling, thanks to new improvements centered around real-world tactics. Around the player’s feet, you will see new Rebound Timing Feedback as a green meter that will flash to indicate a well-timed rebound. Learning Chet Holmgren’s rebound timing made me nearly unstoppable under the rim and made me focus on an aspect of the game I had neglected before.  Collisions and interior defense both benefit from a revamped system-driven tech that allows for more real-time interactions instead of scripted mocap animations. If you want to stop a fast break or crowd the lane, players will stop, adjust, and even collide realistically. The game rewards paying attention to the action when the ball isn’t in your hand. Arena atmosphere The devs also upgraded the game spectacle during downtime and timeouts with new crowd variety, interactions, and on-court performances. Cheerleader routines and mascot antics are fun, but my favorite by far was the dance cam. These moments captured the feel of attending a game live and the sense of community that attending a sporting event can create. MyTEAM updates  MyTEAM has received a significant remodel with Triple Threat Park turning Sunset Beach into a nighttime venue. Players are greeted with neon lights, fireworks, and other details that can only be appreciated after dark. Pulling cards and collecting players has also become an even bigger spectacle with dramatic reveals and added flair.   The biggest change to MyTEAM is that WNBA players join the action for the first time in series history. Newcomers like Angel Reese and Caitlin Clark take to the hardwood along with legends like Lisa Leslie. Attributes and Badges are identical for all players, no matter what league they hail from. Also, there is a WNBA Domination tier where your squad will be exclusively WNBA players as you challenge teams to earn Domination stars and crests.  Another first is 2v2 games in Triple Threat Park. Two half courts have been added in the middle of the street, where you can run your favorite two-person team-ups. The park also features four 3v3 courts, including a new option with a beach backdrop, and three 3v3 courts for 6-player co-op matches. These games capture the essence of streetball, featuring players calling their fouls, checking the ball at midcourt, and engaging in some lively trash talk—a great way to mix and match your favorite ball players and have some quick, high-energy games.  All-Star Team Up is now part of MyTEAM, where 10 players duke it out in 5v5 co-op matches. Take your favorite NBA or WNBA players for some very high-level play where being a good role player is the key to success. Earn individual rewards with the new Season Ladder and earn rewards as a team by winning matches. Find the right chemistry with your teammates, because for every five games you win with the same team lineup, everyone will receive rewards, even if the wins aren’t consecutive.  Discover all the new enhancements coming to the court when NBA 2K 26 launches September 5 on PS5. Vertical Stand sold separately PS5 Console – NBA 2K26 BundleWe’re pleased to announce the PlayStation 5 Console – NBA 2K26 Bundle is launching in Singapore, Malaysia, Thailand starting September 12 and is launching in Indonesia, the Philippines and Vietnam starting September 18. Release dates and availability may vary by region, please check your local retailer for availability and release dates. Players can feel the on-the-court immersion made possible by the DualSense wireless controller’s haptic feedback and adaptive triggers. Experience NBA 2K26’s authenticity with lifelike animations, heightened player fidelity and authentic atmosphere with 4K resolution*, and enjoy shortened load times and return to the action faster with the PS5 console’s high-speed SSD. In Singapore, Malaysia and Thailand, the bundle includes a PlayStation 5 console, DualSense wireless controller, and a digital voucher** for NBA 2K26 Standard Edition. In Indonesia, the Philippines and Vietnam, the bundle includes a PlayStation 5 console, DualSense wireless controller, and a disc version for NBA 2K26 Standard Edition With a robust focus on features and the game aspects that don’t rely on the players, it’s great to play and watch. No matter your height, you should hit the court when NBA 2K26 comes to PS5 and PS4 on September 5. *4K and HDR require a 4K and HDR compatible TV or display. **Account for PlayStation and internet connection required to redeem voucher #southeast #asia #nba #2k26 #handson
    (For Southeast Asia) NBA 2K26: Hands-on report and PS5 bundle details
    blog.playstation.com
    The official start of the season may be two months away, but basketball is back with NBA 2K26 hitting PS5 and PS4 September 5. The latest entry brings a new gameplay system powered by machine learning, studying today’s superstars, and fun pick-up and play options. 2K invited me to go hands-on with the game  before it launches September 5 on PS5, and I’m here to share what I learned on the court. Also launching starting on September 12 (Singapore, Malaysia, Thailand) and on September 18 (Indonesia, Philippines and Vietnam) is the PlayStation 5 Console – NBA 2K26 Bundle. Read on for full details Better ball 2K26 puts considerable effort into improving both sides of the floor, with notable offensive and defensive enhancements. New machine-learning technology helps capture the fundamentals of the game. While playing, I noticed players would run and get set by firmly planting their feet, instead of a gliding effect. While driving into the paint, they would also stop and accurately respond to a defender in their lane. These details add a realistic weight to the sport. Enhanced Rhythm Shooting You can still flick down-up on the right analog stick or simply press square to start your shooting motion, then release at the correct timing for the individual player’s shoot release. However, now the tempo of the play, like in real life, affects your shot. When a good defender bogged me down, I could quickly release my shot and intentionally release it early for a decisive bucket. With a high basketball IQ, any shot has the potential to be a good shot.  Defensive battles Players can swing a game in their favor if the shots aren’t falling, thanks to new improvements centered around real-world tactics. Around the player’s feet, you will see new Rebound Timing Feedback as a green meter that will flash to indicate a well-timed rebound. Learning Chet Holmgren’s rebound timing made me nearly unstoppable under the rim and made me focus on an aspect of the game I had neglected before.  Collisions and interior defense both benefit from a revamped system-driven tech that allows for more real-time interactions instead of scripted mocap animations. If you want to stop a fast break or crowd the lane, players will stop, adjust, and even collide realistically. The game rewards paying attention to the action when the ball isn’t in your hand. Arena atmosphere The devs also upgraded the game spectacle during downtime and timeouts with new crowd variety, interactions, and on-court performances. Cheerleader routines and mascot antics are fun, but my favorite by far was the dance cam. These moments captured the feel of attending a game live and the sense of community that attending a sporting event can create. MyTEAM updates  MyTEAM has received a significant remodel with Triple Threat Park turning Sunset Beach into a nighttime venue. Players are greeted with neon lights, fireworks, and other details that can only be appreciated after dark. Pulling cards and collecting players has also become an even bigger spectacle with dramatic reveals and added flair.   The biggest change to MyTEAM is that WNBA players join the action for the first time in series history. Newcomers like Angel Reese and Caitlin Clark take to the hardwood along with legends like Lisa Leslie. Attributes and Badges are identical for all players, no matter what league they hail from. Also, there is a WNBA Domination tier where your squad will be exclusively WNBA players as you challenge teams to earn Domination stars and crests.  Another first is 2v2 games in Triple Threat Park. Two half courts have been added in the middle of the street, where you can run your favorite two-person team-ups. The park also features four 3v3 courts, including a new option with a beach backdrop, and three 3v3 courts for 6-player co-op matches. These games capture the essence of streetball, featuring players calling their fouls, checking the ball at midcourt, and engaging in some lively trash talk—a great way to mix and match your favorite ball players and have some quick, high-energy games.  All-Star Team Up is now part of MyTEAM, where 10 players duke it out in 5v5 co-op matches. Take your favorite NBA or WNBA players for some very high-level play where being a good role player is the key to success. Earn individual rewards with the new Season Ladder and earn rewards as a team by winning matches. Find the right chemistry with your teammates, because for every five games you win with the same team lineup, everyone will receive rewards, even if the wins aren’t consecutive.  Discover all the new enhancements coming to the court when NBA 2K 26 launches September 5 on PS5. Vertical Stand sold separately PS5 Console – NBA 2K26 Bundle (Southeast Asia details) We’re pleased to announce the PlayStation 5 Console – NBA 2K26 Bundle is launching in Singapore, Malaysia, Thailand starting September 12 and is launching in Indonesia, the Philippines and Vietnam starting September 18. Release dates and availability may vary by region, please check your local retailer for availability and release dates. Players can feel the on-the-court immersion made possible by the DualSense wireless controller’s haptic feedback and adaptive triggers. Experience NBA 2K26’s authenticity with lifelike animations, heightened player fidelity and authentic atmosphere with 4K resolution*, and enjoy shortened load times and return to the action faster with the PS5 console’s high-speed SSD. In Singapore, Malaysia and Thailand, the bundle includes a PlayStation 5 console, DualSense wireless controller, and a digital voucher** for NBA 2K26 Standard Edition. In Indonesia, the Philippines and Vietnam, the bundle includes a PlayStation 5 console, DualSense wireless controller, and a disc version for NBA 2K26 Standard Edition With a robust focus on features and the game aspects that don’t rely on the players, it’s great to play and watch. No matter your height, you should hit the court when NBA 2K26 comes to PS5 and PS4 on September 5. *4K and HDR require a 4K and HDR compatible TV or display. **Account for PlayStation and internet connection required to redeem voucher
    Like
    Love
    Wow
    Sad
    Angry
    738
    · 2 Comments ·0 Shares
  • Creating a Detailed Helmet Inspired by Fallout Using Substance 3D

    IntroductionHi! My name is Pavel Vorobyev, and I'm a 19-year-old 3D Artist specializing in texturing and weapon creation for video games. I've been working in the industry for about 3 years now. During this time, I've had the opportunity to contribute to several exciting projects, including Arma, DayZ, Ratten Reich, and a NEXT-GEN sci-fi shooter. Here's my ArtStation portfolio.My journey into 3D art began in my early teens, around the age of 13 or 14. At some point, I got tired of just playing games and started wondering: "How are they actually made?" That question led me to explore game development. I tried everything – level design, programming, game design – but it was 3D art that truly captured me.I'm entirely self-taught. I learned everything from YouTube, tutorials, articles, and official documentation, gathering knowledge piece by piece. Breaking into the commercial side of the industry wasn't easy: there were a lot of failures, no opportunities, and no support. At one point, I even took a job at a metallurgical plant. But I kept pushing forward, kept learning and improving my skills in 3D. Eventually, I got my first industry offer – and that's when my real path began.Today, I continue to grow, constantly experimenting with new styles, tools, and techniques. For me, 3D isn't just a profession – it's a form of self-expression and a path toward my dream. My goal is to build a strong career in the game industry and eventually move into cinematic storytelling in the spirit of Love, Death & Robots.Astartes YouTube channelI also want to inspire younger artists and show how powerful texturing can be as a creative tool. To demonstrate that, I'd love to share my personal project PU – Part 1, which reflects my passion and approach to texture art.In this article, I'll be sharing my latest personal project – a semi-realistic sci-fi helmet that I created from scratch, experimenting with both form and style. It's a personal exploration where I aimed to step away from traditional hyperrealism and bring in a touch of artistic expression.Concept & Project IdeaThe idea behind this helmet project came from a very specific goal – to design a visually appealing asset with rich texture variation and achieve a balance between stylization and realism. I wanted to create something that looked believable, yet had an artistic flair. Since I couldn't find any fitting concepts online, I started building the design from scratch in my head. I eventually settled on creating a helmet as the main focus of the project. For visual direction, I drew inspiration from post-apocalyptic themes and the gritty aesthetics of Fallout and Warhammer 40,000.Software & Tools UsedFor this project, I used Blender, ZBrush, Substance 3D Painter, Marmoset Toolbag 5, Photoshop, and RizomUV. I created the low-poly mesh in Blender and developed the concept and high-poly sculpt in ZBrush. In Substance 3D Painter, I worked on the texture concept and final texturing. Baking and rendering were done in Marmoset Toolbag, and I used Photoshop for some adjustments to the bake. UV unwrapping was handled in RizomUV.Modeling & RetopologyI began the development process by designing the concept based on my earlier references – Fallout and Warhammer 40,000. The initial blockout was done in ZBrush, and from there, I started refining the shapes and details to create something visually engaging and stylistically bold.After completing the high-poly model, I moved on to the long and challenging process of retopology. Since I originally came from a weapons-focused background, I applied the knowledge I gained from modeling firearms. I slightly increased the polycount to achieve a cleaner and more appealing look in the final render – reducing visible faceting. My goal was to strike a balance between visual quality and a game-ready asset.UV Mapping & BakingNext, I moved on to UV mapping. There's nothing too complex about this stage, but since my goal was to create a game-ready asset, I made extensive use of overlaps. I did the UVs in Rizom UV. The most important part is to align the UV shells into clean strips and unwrap cylinders properly into straight lines.Once the UVs were done, I proceeded to bake the normal and ambient occlusion maps. At this stage, the key is having clean UVs and solid retopology – if those are in place, the bake goes smoothly. Texturing: Concept & WorkflowNow we move on to the most challenging stage – texturing. I aimed to present the project in a hyperrealistic style with a touch of stylization. This turned out to be quite difficult, and I went through many iterations. The most important part of this phase was developing a solid texture concept: rough decals, color combinations, and overall material direction. Without that foundation, it makes no sense to move forward with the texturing. After a long process of trial and error, I finally arrived at results I was satisfied with.Then I followed my pipeline:1. Working on the base materials2. Storytelling and damage3. Decals4. Spraying, dust, and dirtWorking on the Base MaterialsWhen working on the base materials, the main thing is to work with the physical properties and texture. You need to extract the maximum quality from the generators before manual processing. The idea was to create the feeling of an old, heavy helmet that had lived its life and had previously been painted a different color. To make it battered and, in a sense, rotten.It is important to pay attention to noise maps – Dirt 3, Dirt 6, White Noise, Flakes – and add the feel of old metal with custom Normal Maps. I also mixed in photo textures for a special charm. PhototextureCustom Normal Map TextureStorytelling & DamageGradients play an important role in the storytelling stage. They make the object artistically dynamic and beautiful, adding individual shades that bring the helmet to life.Everything else is done manually. I found a bunch of old helmets from World War II and took alpha damage shots of them using Photoshop. I drew the damage with alphas, trying to clearly separate the material into old paint, new paint, rust, and bare metal.I did the rust using MatFX Rust from the standard Substance 3D Painter library. I drew beautiful patterns using paint in multiply mode – this quickly helped to recreate the rust effect. Metal damage and old paint were more difficult: due to the large number of overlaps in the helmet, I had to carefully draw patterns, minimizing the visibility of overlaps.DecalsI drew the decals carefully, sticking to the concept, which added richness to the texture.Spray Paint & DirtFor spray paint and dirt, I used a long-established weapon template consisting of dust particles, sand particles, and spray paint. I analyzed references and applied them to crevices and logical places where dirt could accumulate.Rendering & Post-ProcessingI rendered in Marmoset Toolbag 5 using a new rendering format that I developed together with the team. The essence of the method is to simulate "RAW frames." Since Marmoset does not have such functions, I worked with the EXR 32-BIT format, which significantly improves the quality of the render: the shadows are smooth, without artifacts and broken gradients. I assembled the scene using Quixel Megascans. After rendering, I did post-processing in Photoshop utilizing Filter Camera Raw. Conclusion & Advice for BeginnersThat's all. For beginners or those who have been unsuccessful in the industry for a long time, I advise you to follow your dream and not listen to anyone else. Success is a matter of time and skill! Talent is not something you are born with; it is something you develop. Work on yourself and your work, put your heart into it, and you will succeed!Pavel Vorobiev, Texture ArtistInterview conducted by Gloria Levine
    #creating #detailed #helmet #inspired #fallout
    Creating a Detailed Helmet Inspired by Fallout Using Substance 3D
    IntroductionHi! My name is Pavel Vorobyev, and I'm a 19-year-old 3D Artist specializing in texturing and weapon creation for video games. I've been working in the industry for about 3 years now. During this time, I've had the opportunity to contribute to several exciting projects, including Arma, DayZ, Ratten Reich, and a NEXT-GEN sci-fi shooter. Here's my ArtStation portfolio.My journey into 3D art began in my early teens, around the age of 13 or 14. At some point, I got tired of just playing games and started wondering: "How are they actually made?" That question led me to explore game development. I tried everything – level design, programming, game design – but it was 3D art that truly captured me.I'm entirely self-taught. I learned everything from YouTube, tutorials, articles, and official documentation, gathering knowledge piece by piece. Breaking into the commercial side of the industry wasn't easy: there were a lot of failures, no opportunities, and no support. At one point, I even took a job at a metallurgical plant. But I kept pushing forward, kept learning and improving my skills in 3D. Eventually, I got my first industry offer – and that's when my real path began.Today, I continue to grow, constantly experimenting with new styles, tools, and techniques. For me, 3D isn't just a profession – it's a form of self-expression and a path toward my dream. My goal is to build a strong career in the game industry and eventually move into cinematic storytelling in the spirit of Love, Death & Robots.Astartes YouTube channelI also want to inspire younger artists and show how powerful texturing can be as a creative tool. To demonstrate that, I'd love to share my personal project PU – Part 1, which reflects my passion and approach to texture art.In this article, I'll be sharing my latest personal project – a semi-realistic sci-fi helmet that I created from scratch, experimenting with both form and style. It's a personal exploration where I aimed to step away from traditional hyperrealism and bring in a touch of artistic expression.Concept & Project IdeaThe idea behind this helmet project came from a very specific goal – to design a visually appealing asset with rich texture variation and achieve a balance between stylization and realism. I wanted to create something that looked believable, yet had an artistic flair. Since I couldn't find any fitting concepts online, I started building the design from scratch in my head. I eventually settled on creating a helmet as the main focus of the project. For visual direction, I drew inspiration from post-apocalyptic themes and the gritty aesthetics of Fallout and Warhammer 40,000.Software & Tools UsedFor this project, I used Blender, ZBrush, Substance 3D Painter, Marmoset Toolbag 5, Photoshop, and RizomUV. I created the low-poly mesh in Blender and developed the concept and high-poly sculpt in ZBrush. In Substance 3D Painter, I worked on the texture concept and final texturing. Baking and rendering were done in Marmoset Toolbag, and I used Photoshop for some adjustments to the bake. UV unwrapping was handled in RizomUV.Modeling & RetopologyI began the development process by designing the concept based on my earlier references – Fallout and Warhammer 40,000. The initial blockout was done in ZBrush, and from there, I started refining the shapes and details to create something visually engaging and stylistically bold.After completing the high-poly model, I moved on to the long and challenging process of retopology. Since I originally came from a weapons-focused background, I applied the knowledge I gained from modeling firearms. I slightly increased the polycount to achieve a cleaner and more appealing look in the final render – reducing visible faceting. My goal was to strike a balance between visual quality and a game-ready asset.UV Mapping & BakingNext, I moved on to UV mapping. There's nothing too complex about this stage, but since my goal was to create a game-ready asset, I made extensive use of overlaps. I did the UVs in Rizom UV. The most important part is to align the UV shells into clean strips and unwrap cylinders properly into straight lines.Once the UVs were done, I proceeded to bake the normal and ambient occlusion maps. At this stage, the key is having clean UVs and solid retopology – if those are in place, the bake goes smoothly. Texturing: Concept & WorkflowNow we move on to the most challenging stage – texturing. I aimed to present the project in a hyperrealistic style with a touch of stylization. This turned out to be quite difficult, and I went through many iterations. The most important part of this phase was developing a solid texture concept: rough decals, color combinations, and overall material direction. Without that foundation, it makes no sense to move forward with the texturing. After a long process of trial and error, I finally arrived at results I was satisfied with.Then I followed my pipeline:1. Working on the base materials2. Storytelling and damage3. Decals4. Spraying, dust, and dirtWorking on the Base MaterialsWhen working on the base materials, the main thing is to work with the physical properties and texture. You need to extract the maximum quality from the generators before manual processing. The idea was to create the feeling of an old, heavy helmet that had lived its life and had previously been painted a different color. To make it battered and, in a sense, rotten.It is important to pay attention to noise maps – Dirt 3, Dirt 6, White Noise, Flakes – and add the feel of old metal with custom Normal Maps. I also mixed in photo textures for a special charm. PhototextureCustom Normal Map TextureStorytelling & DamageGradients play an important role in the storytelling stage. They make the object artistically dynamic and beautiful, adding individual shades that bring the helmet to life.Everything else is done manually. I found a bunch of old helmets from World War II and took alpha damage shots of them using Photoshop. I drew the damage with alphas, trying to clearly separate the material into old paint, new paint, rust, and bare metal.I did the rust using MatFX Rust from the standard Substance 3D Painter library. I drew beautiful patterns using paint in multiply mode – this quickly helped to recreate the rust effect. Metal damage and old paint were more difficult: due to the large number of overlaps in the helmet, I had to carefully draw patterns, minimizing the visibility of overlaps.DecalsI drew the decals carefully, sticking to the concept, which added richness to the texture.Spray Paint & DirtFor spray paint and dirt, I used a long-established weapon template consisting of dust particles, sand particles, and spray paint. I analyzed references and applied them to crevices and logical places where dirt could accumulate.Rendering & Post-ProcessingI rendered in Marmoset Toolbag 5 using a new rendering format that I developed together with the team. The essence of the method is to simulate "RAW frames." Since Marmoset does not have such functions, I worked with the EXR 32-BIT format, which significantly improves the quality of the render: the shadows are smooth, without artifacts and broken gradients. I assembled the scene using Quixel Megascans. After rendering, I did post-processing in Photoshop utilizing Filter Camera Raw. Conclusion & Advice for BeginnersThat's all. For beginners or those who have been unsuccessful in the industry for a long time, I advise you to follow your dream and not listen to anyone else. Success is a matter of time and skill! Talent is not something you are born with; it is something you develop. Work on yourself and your work, put your heart into it, and you will succeed!Pavel Vorobiev, Texture ArtistInterview conducted by Gloria Levine #creating #detailed #helmet #inspired #fallout
    Creating a Detailed Helmet Inspired by Fallout Using Substance 3D
    80.lv
    IntroductionHi! My name is Pavel Vorobyev, and I'm a 19-year-old 3D Artist specializing in texturing and weapon creation for video games. I've been working in the industry for about 3 years now. During this time, I've had the opportunity to contribute to several exciting projects, including Arma, DayZ, Ratten Reich, and a NEXT-GEN sci-fi shooter (currently under NDA). Here's my ArtStation portfolio.My journey into 3D art began in my early teens, around the age of 13 or 14. At some point, I got tired of just playing games and started wondering: "How are they actually made?" That question led me to explore game development. I tried everything – level design, programming, game design – but it was 3D art that truly captured me.I'm entirely self-taught. I learned everything from YouTube, tutorials, articles, and official documentation, gathering knowledge piece by piece. Breaking into the commercial side of the industry wasn't easy: there were a lot of failures, no opportunities, and no support. At one point, I even took a job at a metallurgical plant. But I kept pushing forward, kept learning and improving my skills in 3D. Eventually, I got my first industry offer – and that's when my real path began.Today, I continue to grow, constantly experimenting with new styles, tools, and techniques. For me, 3D isn't just a profession – it's a form of self-expression and a path toward my dream. My goal is to build a strong career in the game industry and eventually move into cinematic storytelling in the spirit of Love, Death & Robots.Astartes YouTube channelI also want to inspire younger artists and show how powerful texturing can be as a creative tool. To demonstrate that, I'd love to share my personal project PU – Part 1, which reflects my passion and approach to texture art.In this article, I'll be sharing my latest personal project – a semi-realistic sci-fi helmet that I created from scratch, experimenting with both form and style. It's a personal exploration where I aimed to step away from traditional hyperrealism and bring in a touch of artistic expression.Concept & Project IdeaThe idea behind this helmet project came from a very specific goal – to design a visually appealing asset with rich texture variation and achieve a balance between stylization and realism. I wanted to create something that looked believable, yet had an artistic flair. Since I couldn't find any fitting concepts online, I started building the design from scratch in my head. I eventually settled on creating a helmet as the main focus of the project. For visual direction, I drew inspiration from post-apocalyptic themes and the gritty aesthetics of Fallout and Warhammer 40,000.Software & Tools UsedFor this project, I used Blender, ZBrush, Substance 3D Painter, Marmoset Toolbag 5, Photoshop, and RizomUV. I created the low-poly mesh in Blender and developed the concept and high-poly sculpt in ZBrush. In Substance 3D Painter, I worked on the texture concept and final texturing. Baking and rendering were done in Marmoset Toolbag, and I used Photoshop for some adjustments to the bake. UV unwrapping was handled in RizomUV.Modeling & RetopologyI began the development process by designing the concept based on my earlier references – Fallout and Warhammer 40,000. The initial blockout was done in ZBrush, and from there, I started refining the shapes and details to create something visually engaging and stylistically bold.After completing the high-poly model, I moved on to the long and challenging process of retopology. Since I originally came from a weapons-focused background, I applied the knowledge I gained from modeling firearms. I slightly increased the polycount to achieve a cleaner and more appealing look in the final render – reducing visible faceting. My goal was to strike a balance between visual quality and a game-ready asset.UV Mapping & BakingNext, I moved on to UV mapping. There's nothing too complex about this stage, but since my goal was to create a game-ready asset, I made extensive use of overlaps. I did the UVs in Rizom UV. The most important part is to align the UV shells into clean strips and unwrap cylinders properly into straight lines.Once the UVs were done, I proceeded to bake the normal and ambient occlusion maps. At this stage, the key is having clean UVs and solid retopology – if those are in place, the bake goes smoothly. Texturing: Concept & WorkflowNow we move on to the most challenging stage – texturing. I aimed to present the project in a hyperrealistic style with a touch of stylization. This turned out to be quite difficult, and I went through many iterations. The most important part of this phase was developing a solid texture concept: rough decals, color combinations, and overall material direction. Without that foundation, it makes no sense to move forward with the texturing. After a long process of trial and error, I finally arrived at results I was satisfied with.Then I followed my pipeline:1. Working on the base materials2. Storytelling and damage3. Decals4. Spraying, dust, and dirtWorking on the Base MaterialsWhen working on the base materials, the main thing is to work with the physical properties and texture. You need to extract the maximum quality from the generators before manual processing. The idea was to create the feeling of an old, heavy helmet that had lived its life and had previously been painted a different color. To make it battered and, in a sense, rotten.It is important to pay attention to noise maps – Dirt 3, Dirt 6, White Noise, Flakes – and add the feel of old metal with custom Normal Maps. I also mixed in photo textures for a special charm. PhototextureCustom Normal Map TextureStorytelling & DamageGradients play an important role in the storytelling stage. They make the object artistically dynamic and beautiful, adding individual shades that bring the helmet to life.Everything else is done manually. I found a bunch of old helmets from World War II and took alpha damage shots of them using Photoshop. I drew the damage with alphas, trying to clearly separate the material into old paint, new paint, rust, and bare metal.I did the rust using MatFX Rust from the standard Substance 3D Painter library. I drew beautiful patterns using paint in multiply mode – this quickly helped to recreate the rust effect. Metal damage and old paint were more difficult: due to the large number of overlaps in the helmet, I had to carefully draw patterns, minimizing the visibility of overlaps.DecalsI drew the decals carefully, sticking to the concept, which added richness to the texture.Spray Paint & DirtFor spray paint and dirt, I used a long-established weapon template consisting of dust particles, sand particles, and spray paint. I analyzed references and applied them to crevices and logical places where dirt could accumulate.Rendering & Post-ProcessingI rendered in Marmoset Toolbag 5 using a new rendering format that I developed together with the team. The essence of the method is to simulate "RAW frames." Since Marmoset does not have such functions, I worked with the EXR 32-BIT format, which significantly improves the quality of the render: the shadows are smooth, without artifacts and broken gradients. I assembled the scene using Quixel Megascans. After rendering, I did post-processing in Photoshop utilizing Filter Camera Raw. Conclusion & Advice for BeginnersThat's all. For beginners or those who have been unsuccessful in the industry for a long time, I advise you to follow your dream and not listen to anyone else. Success is a matter of time and skill! Talent is not something you are born with; it is something you develop. Work on yourself and your work, put your heart into it, and you will succeed!Pavel Vorobiev, Texture ArtistInterview conducted by Gloria Levine
    Like
    Love
    Wow
    Sad
    Angry
    701
    · 2 Comments ·0 Shares
More Results
ollo https://www.ollo.ws